Photo Credit
In 1987, a small warehouse filled with texture-painted walls and rock-shaped hand and foot holds opened for business on the shores of Salmon Bay in Seattle, Washington. The owners called the place “Vertical Club" (now Vertical World) and encouraged devoted rock climbers from the Puget Sound area to come and train for their climbing adventures indoors during Seattle’s long and dreary winters.
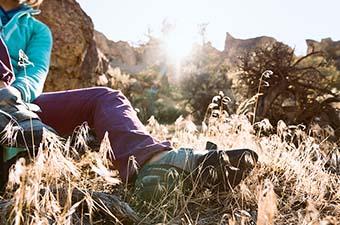
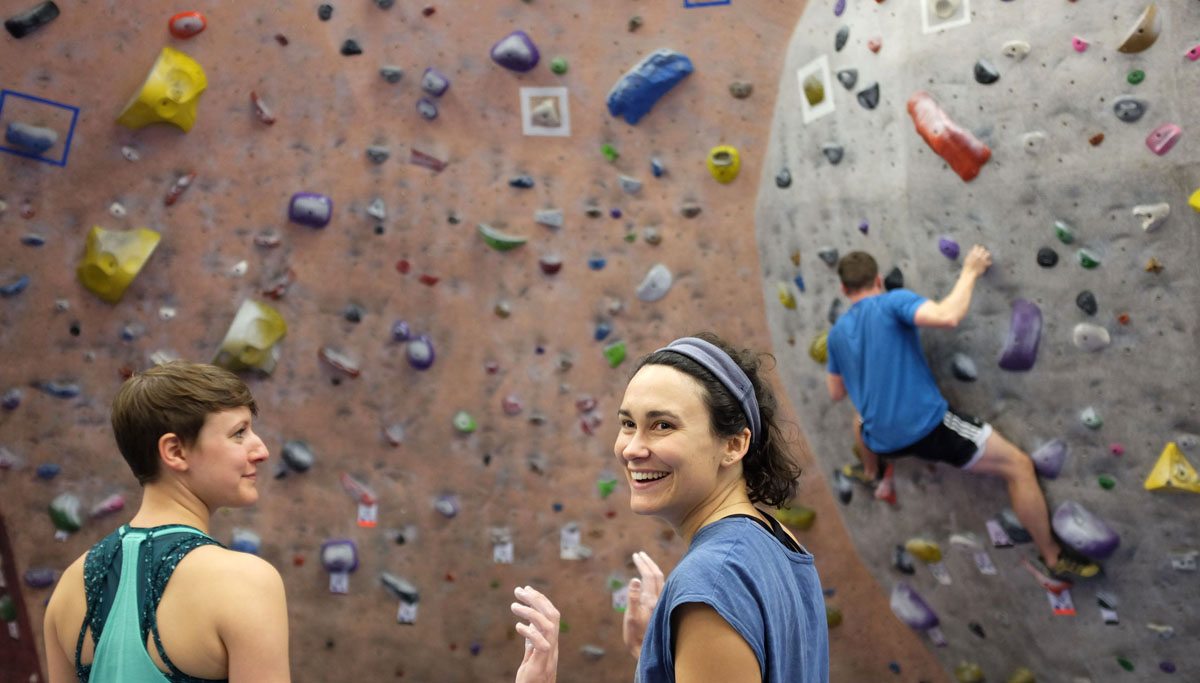
Climbing gyms have come a long way in the past 30 years. Now, there are six state-of-the-art facilities in Seattle, over 10 in the Denver metropolitan area, and most cities across the country are following suit. Even in places like Florida and Kansas where there’s no actual outdoor rock climbing for miles, indoor climbing gyms abound. Why the popularity? Simply put, indoor climbing is hip, social, a great workout, and exhilarating. If you’ve never been to a climbing gym, though, you probably have a lot of questions that you need answered. Below we break down everything you need to know before your first gym session, including safety techniques, tips on acing a belay test, the proper gear to buy, gym etiquette, and more.
Let’s get some terms and definitions out of the way here at the start. You’ll often hear people referring to bouldering, top roping, or leading. But what do they mean? When you walk into a climbing gym, you’ll probably see a number of shorter (10 to 15-foot) walls and taller (25 to 50-foot) walls. The floor of the entire gym is probably going to be a foam mat, but underneath the shorter walls, you’ll probably see big foam gymnastic mats scattered around. The taller walls will have ropes hanging from the top, or if they are steeply overhanging, metal clips hanging periodically all the way up.
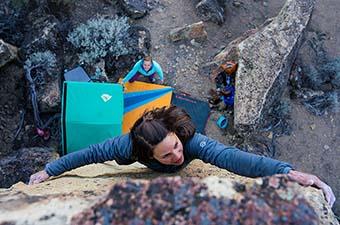
Bouldering. The shorter walls with no ropes or clips are for bouldering. Bouldering is one of climbing’s most popular disciplines. The major draw to bouldering is how social it is (you can easily get drawn into a crowd all working on the same “problem,” whereas rope climbing is more of a two-person activity). That said, people also gravitate to bouldering because the only gear you need for it is shoes and chalk, so the fee of entry is relatively low. Finally, bouldering is the purest form of climbing. There are no ropes and no belayers—it’s just you and the rock. Many people are drawn to that freedom of unencumbered movement.

Top-Roping. The tall walls with the ropes on them are top roping walls. That is to say, you start out with the rope pre-placed on top. Top roping arguably is the safest kind of climbing and a great place to start as a beginner. You’ll have to overcome the fear factor of being up high off the ground, but that largely comes down to trusting the gear and your belayer (the partner who is securing you in case you fall, and who will lower you when it’s time to come down).
Lead Climbing. The tall walls with no ropes on them are for lead climbing (or simply, “leading”). Lead climbing is an advanced form of climbing that requires knowledge and technical expertise, and also involves greater risks than top roping. In lead climbing, you start with the rope on the ground. As you climb up the wall, you clip the rope to the metal clips hanging every 5 to 10 feet, effectively reducing the size of the fall you might take each time you clip. If you do fall when you’re, say, 7 feet above the last clip, you’ll fall the 7 feet down to the clip as well as 7 feet below the clip. So even though you only had 7 feet of rope out above the last protection, the total distance you fall will be 14 feet (not including rope stretch). The thrill of the possible falls is exhilarating but the danger can be very real. If you want to lead climb, consider taking a class at the gym or finding a mentor.
It might sound counterintuitive, but climbing indoors—even when you’re 20 or 30 feet off the ground—is surprisingly safe. While it’s true that you have to sign a waiver before you even set foot on the padded floors, it’s also true that these gyms have to carry rigorous and comprehensive (read: expensive) insurance. To be sure, accidents do happen—typically bouldering, where people tend to roll or break ankles from nasty falls—but they really aren’t that common. In 15 years of indoor climbing, I’ve only seen two accidents involving broken or fractured ankles, and I climb indoors a lot.
If climbing gyms were as dangerous or sketchy as they might feel to a new climber, they would never stay in business. If you’re really worried about it, though, your best bet is to stick to top rope climbs. That’s right, we’re telling you to go higher. Again, we know this is counterintuitive, but the fact is that, aside from failure on the part of a certified belayer or failure on the part of certified equipment (both of which are extremely rare), there is very little that can go wrong when climbing on a top rope. You can pull a muscle or sprain a tendon if you try to do more than your body can handle, but that goes for any physical activity.
If you want to use the ropes at the gym, you’ll need to have a partner that has passed a belay test. And in many gyms, you’ll also have to pass a belay test yourself. Belaying is the term used to describe securing and managing the rope while someone is climbing in order to safely catch falls and lower your climber. A top rope belay test will cover tying in, proper equipment checks, climbing commands, taking in slack, catching falls, and lowering (again, leading is more complex and will require advanced techniques).
It seems like a lot, but it’s not nearly as difficult as it sounds. In fact, we used to teach beginner rock climbing classes and would have complete beginners certified in less than four hours. It’s almost impossible to teach these fundamentals via writing—you really need to be hands on with the ropes and equipment—but here are some helpful hints for each part of the test:

Tying in. You’ll need to learn the Figure-8 Follow-Through Knot (sometimes followed by a completely unnecessary, but attractive, Double Fishermen’s backup knot). There’s a helpful video on it here. Just remember: first you tie a Figure 8 (with an arm’s length or more of rope out), then you pass the end of the rope through the tie-in points of your harness (not the belay loop, but the points connected by the belay loop), then you retrace the 8 before adding an optional backup knot.
Equipment checks. You’ll need to check that the knot is properly tied and through the correct tie-in points. Next comes the belay device and carabiner: vocalize that the belay device is properly loaded and verify the carabiner is locked. Confirm that both the climber and the belayer’s harnesses are put on properly, and that the buckles (if necessary) are doubled back. Most newer harnesses on the market are already set up properly, but it’s always a good idea to check that the webbing is correctly secured at the waist and leg loops.
Climbing commands. You need to know commands in order to be sure both the climber and belayer are ready before the climber starts. Following the equipment checks, the climber asks, “On belay?” When the belayer is ready, he or she responds: “Belay on!” Then, the climber announces “climbing,” to which the belayer affirms, “climb on!”
PBUS. There are scores of different ways to take up the slack generated as the climber ascends the wall, but today most belayers use the PBUS (pull, brake, under, slide) method. This video gives a good sense of how PBUS works. The most important thing to remember with belaying is not to take your brake hand off the rope—ever. The PBUS method gives you a way to continually pull in slack without doing that. To reiterate, this method is specific to top-rope settings, and lead climbers will need to learn a more advanced method before belaying their climbing partner.
Catching falls. This part is easy, as long as you are using the proper PBUS method. As long as your hand is in the brake position when the climber falls (or as long as you bring it to that position as soon as the fall happens), it requires very little strength to catch a fall.
Lowering other climbers. Lowering just requires slowly allowing the rope to slide through your brake hand creating a controlled and slow descent. It’s better at first to go too slow than too fast. Just play around with it a little and you’ll find a happy medium that is comfortable for your climber and your hand.
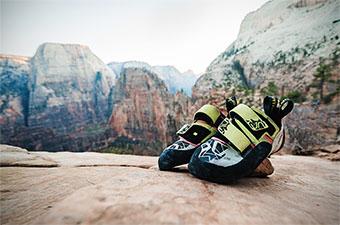
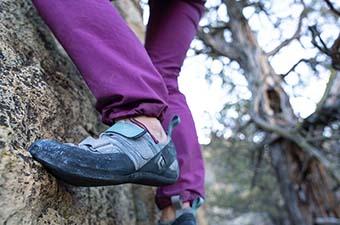
If you’re a true beginner, your shoes should be snug but comfortable and relatively flat-soled. It’s easy to spend $200 on a pair of shoes these days, but we don’t recommend doing so if you’re just starting out. Entry-level models like the Evolv Defy (and women’s Elektra) or Butora Endeavor are great all-around options. If you’re someone who catches on fast, you might want to go with a more advanced shoe with a moderate downturn (banana shape) and relatively tight fit, like the Scarpa Instinct VS or Five Ten Hiangle. To help with your buying decision, see our articles on the best rock climbing shoes for beginners and best overall rock climbing shoes (aimed more toward intermediate to advanced climbers).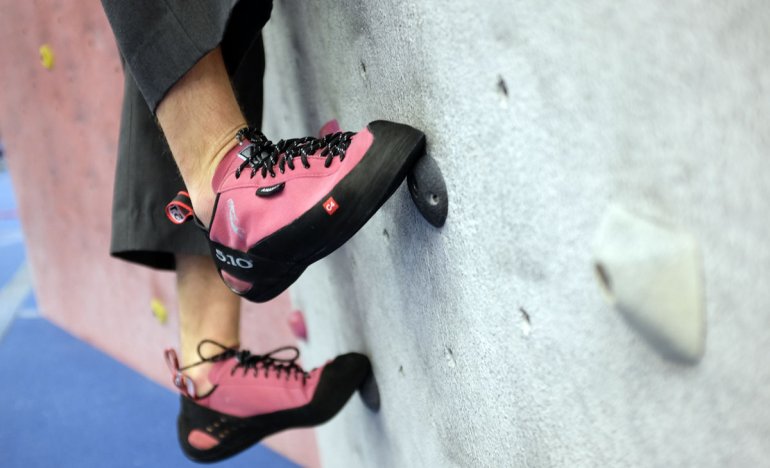
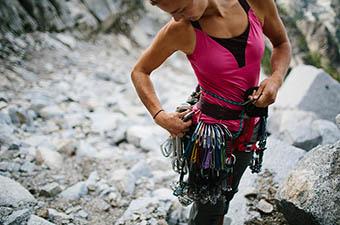
If you’re thinking of getting a harness for use in the gym, you should look for something comfortable and durable. A lot of high-end harnesses are meant for trad, alpine, or sport climbing and made with outdoor climbing specifically in mind. That means they are super lightweight (since you will often be hiking long distances with them in your pack) and sleek (since you will likely keep it on all day and sometimes hike a good bit wearing it). However, neither of those factors are major concerns with a harness for indoor climbing. Instead, you should count on spending a lot of time hanging and falling, and that means you should buy a harness that’s comfortable and long-lasting. And if you’re a beginner and not quite sure what you think of the sport, don’t spend $150 on a harness. You can get a perfectly good model for $50. If you become completely obsessed later on, then you can drop the big bucks on a luxury harness.
For indoor climbing, consider the Black Diamond Momentum or Edelrid Jay (or women’s Jayne), which are both priced reasonably at $60 and feature all the bells and whistles you’ll need for indoor walls. If you’re looking for a harness that prioritizes comfort, check out the generously padded Metolius Safe Tech Deluxe and Misty Mountain Cadillac, although both are almost double the cost of the aforementioned models and overkill for newer gym climbers. For a wider look at the market and our top-ranked options, see our article on the best climbing harnesses.
There are tons of different kinds of belay types, including archaic “8-style” devices, modern tube-style devices (like the Black Diamond ATC), assisted-braking devices (such as the Petzl Grigri), or just tying a Munter hitch on a locking carabiner. The two most common kinds to see, and the ones required by most gyms, are tube-style devices (commonly referred to as ATCs, regardless of the brand) and Grigris..jpg)
An ATC is a $10 to $30 device that provides the belayer with enough friction to catch any climbing fall. It does not have an auto-locking mechanism or assisted brake mode. What this means is that if you let go of the brake side of the rope while the climber is hanging on it or falling, the climber will fall all the way to the ground. The Petzl Grigri, on the other hand, will run you around $80 to $100 but has an assisted braking mechanism that engages when the climber hangs on the rope. Most of the time, you could let go with your hand and the climber would not fall. That said, neither Petzl (the manufacturer of the Grigri) nor any gym suggests using the Grigri as a hands-free device. In other words, you use it the same way as you would with the ATC.
There has been a ton of debate over the years about which kind of belaying device is better, and most of it arises from improper use of the devices. Basically, if you belay using the proper PBUS method, it won’t matter whether you have an ATC or a Grigri. The big advantage of the Grigri is that it makes it easier to hold the rope when a climber is hanging on it (your brake hand is a back-up to the device’s camming mechanism, rather than the engaged component in the system). The disadvantage is that it had moving pieces and levers and requires more intricate knowledge to use properly.
Regardless of which device you prefer, it’s worth noting that many gyms have a preference of their own. Before you make your purchase, make sure the gym you’re climbing at allows you to use that device. It can go either way so don’t make assumptions. Ask first, buy second. And for more information on belay devices, check out our article on the best belay devices for climbing.
There’s a small mountain town on the border of Germany and the Czech Republic called Elb Sandstein, where local climbers have opted not to use chalk for hands in order to maintain the natural appearance of the stone. Everywhere else, they use chalk and the gym is no exception. Chalk dries out your hands which start sweating profusely when climbing, allowing you to maintain better friction on slippery holds. That said, it’s worth knowing a few things about chalk and chalk bags. Consider the following points.
Chalk bags vs. chalk buckets. Most climbers who climb on ropes carry a small amount of chalk with them on their harness in order to dry their hands repeatedly as they ascend the wall. For that purpose, you’ll want a chalk bag. Boulderers, on the other hand, don’t usually carry chalk with them while climbing, since they are only on the wall for 10 to 15 feet. Instead of chalk bags, they typically prefer chalk buckets: larger pods or sacks with big wide openings and slots or pockets to carry brushes, snacks, etc. Organic Climbing’s Lunch Bag Chalk Bucket is the one we see most often, and it’s a good one. If you’re looking for a chalk bag, the Metolius Competition bag is cheap and deep, and Black Diamond’s Gym Chalk Bag comes with a refillable chalk ball and a slot for your belay tag.
Chalk balls vs. loose chalk. This is a good one to ask your local gym about. They may have a preference (a lot of gyms don’t like loose chalk because it’s messy). Personally, I far prefer loose chalk. You can just dip your hand in and it dries off instantly, whereas a chalk ball you actually need to squeeze to get the chalk. Who wants to squeeze when your forearms are already completely pumped? That said, chalk balls are nice, clean, and often refillable. Consider the Metolius Super Chalk Sock.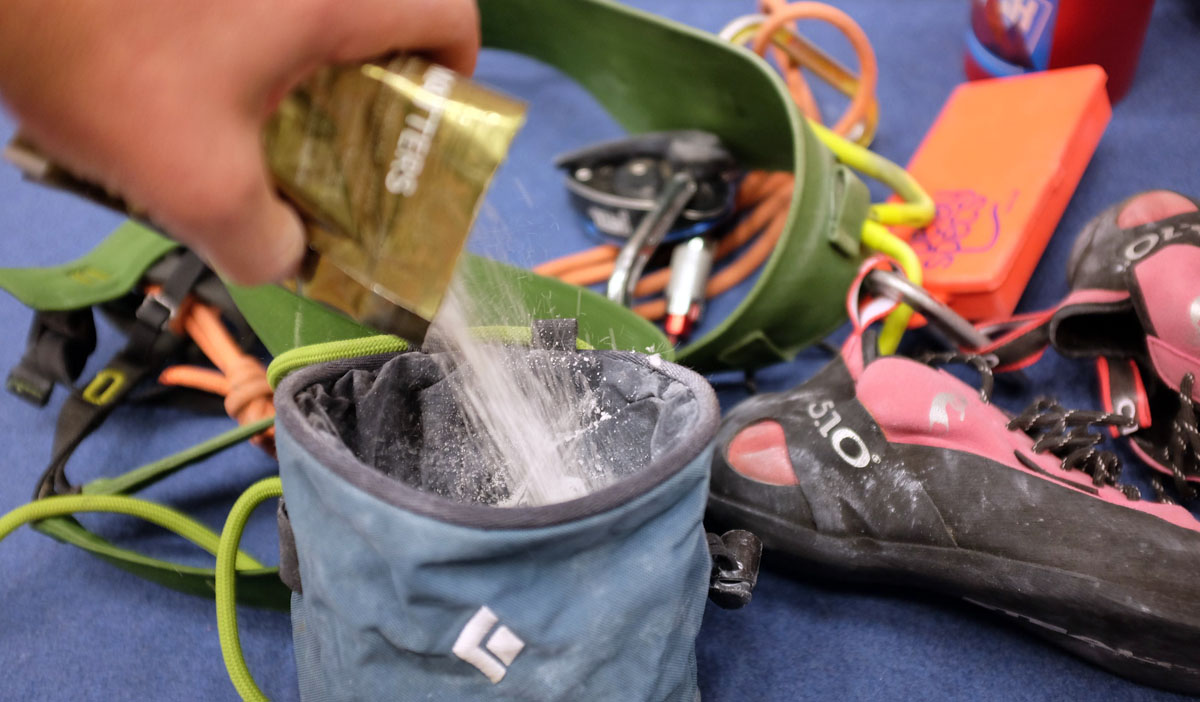
Liquid chalk. This is sort of a new fangled invention but it’s actually really cool. You combine powdered chalk with rubbing alcohol in a squeeze tube, and shake it up. Apply to your hands, and the rubbing alcohol evaporates leaving an even and clean layer of chalk on your hands. This stuff is a bit pricier than regular chalk but it’s definitely less messy. Petzl makes a good blend.
Beware of drying agents. While we don’t know the chemical formula for these drying agents, we do know they dry out our hands so much that they’re left chapped and cracked. We recommend avoiding drying agents at first, and only turn to them if you absolutely need to.
Friction Labs: This may be the first chalk-specific climbing company ever. Friction Labs chalk is super expensive, but they claim it works wonders for making your hands grippy (and we know many climbers who swear by the stuff). We’ve used it here and there, and it does work fairly well. But then again, so does just plain old-fashioned (and much cheaper) chalk. We’ll let you decide if it’s worth the steep price tag.
In a decade and a half of being involved in the sport, we’ve never seen anyone wear a helmet while climbing indoors. That said, you can definitely hit your head in a climbing gym, and particularly when lead climbing. If you take a lead fall with your leg behind the rope, the rope can flip you upside down, bringing your head in contact with the wall. If you aren’t wearing a helmet (which you probably aren’t), be extra careful about your footwork. Look out for heel hooks or other sideways body positions at the top of bouldering walls, especially if there are large holds protruding out underneath you. And if you prefer to err on the side of caution, we’ve created a comprehensive list of our favorite climbing helmets here.
Climbing gym etiquette varies from person to person, place to place, and climbing discipline to climbing discipline. That said, there are a few old standbys that you can take as good etiquette guidelines:
Don’t clog up the routes. Everyone wants a turn to climb, mostly on the best routes. Look at the route or boulder problem from a reasonable distance, consider the moves and the difficulty, give it a shot, and when you fall or climb it successfully, come down and walk away so others can try it. If you aren’t sure what you want to climb, stand back from the wall so others know the routes are available.
Don’t offer advice (“beta”) unless someone asks for it. This is affectionately dubbed, “spewing beta”. Many climbers relish the opportunity to figure out how to do a climb for themselves. More to the point, there’s usually more than one way to skin a cat. Try to maintain a policy of keeping quiet. If it’s just killing you, ask if someone wants advice before you offer it.
Don’t be shy with spotting. People sit around and watch one another take huge bouldering falls all the time, but you don’t need to know someone to spot them. If you see someone trying really hard up high, get in position, and let them know you have their spot. Move the pads if necessary. But don’t be that creepy person that walks up unannounced and spots every spandex-clad climber in the gym. That’s not OK. And touching while spotting definitely is not OK unless someone asks.
Be wary of the shameless hangdog. If you’re spending a long time hanging around on a roped climb, that’s called “hangdogging”. It can also be called “projecting”. Basically, there’s no shame in taking a long time to figure out how to do a climb, but be courteous to other climbers. If somebody else wants to get on the route, consider lowering and trying again later.
Keep an eye on your kids. These days, it seems like kids are everywhere in the gym. Sometimes it feels like they’re more than half the clientele. If you are a parent and you bring your kid to the gym, realize that it’s not a daycare center. Just because you sign the waiver doesn’t mean you’re free to sit down and stare at your smart phone. Keep an eye on your children, make sure they are being safe, and try to encourage them to give other climbers a fair chance at getting on the routes. It’s awesome they are getting after it so young, and us adults are glad they are there. But when your five-year-old walks absentmindedly under us when we’re ten feet off the ground and about to fall because you’re not paying attention, that’s not cool.
Climbing is a great sport for kids, and climbing gyms love young climbers. Most facilities have areas specifically for children, as well as after-school programs, teams, and birthday party accommodations. Climbing gyms actually tend to generate a lot their revenue from kids.
If you bring your kids, you’ll need to sign a waiver on their behalf. If you send them off with the babysitter or your other teenage child, make sure to print out the waiver online and sign it beforehand. Kids can start climbing at a very young age—usually as young as the gym allows. The climbing gym is a great opportunity for you and your child to start something new together, and then for the incredible role reversal of your child becoming infinitely more skilled than you in a short timeframe.
Your first time to the climbing gym, you’ll probably get a day pass ($15-25) and rental equipment ($5-10). For that, you can climb all day until the gym closes with no limit on routes or climbs. Some gyms offer discounts for students or members of affiliate organizations such as the American Alpine Club or Access Fund. And members often have free guest passes they can use for your first time.
Most people either love climbing or they hate it. It’s not a lukewarm kind of sport. If you love it, don’t keep buying the day pass and renting gear. Chances are you’ll get bit by the climbing bug pretty hard and start going two to four times a week. You can usually get a membership for somewhere between $50 and $75 per month. A pair of shoes will run you $75-$100. Chalk and a chalk bag should top out at $20. And if you’re going to be rope climbing, a harness, locking carabiner, and belay device will be another $100. So you’re looking at an initial investment of about $150 to 250 to get all the gear you need, a day pass or two, and your first month of membership. That’s not too bad if you think about it. Most climbing gyms have free yoga classes, a weight room, and treadmills and bikes as well, so it’s really a pretty good deal.
There’s a really good chance you can find a climbing gym within an hour's drive. The sport is growing at an exponential rate, and climbing gyms are popping up and left and right these days. Gyms tend to be located in or around city centers, often in somewhat overlooked industrial zones where there are big buildings but not too many commercial establishments. They’re also becoming a fixture in many YMCA facilities and local recreation centers. And one final thing to keep in mind is that climbing is considered a “destination sport.” This means people have shown that they will travel to participate, and a couple of our staff members have regularly attended gyms that were an hour’s drive away. The main takeaway: don’t write off the climbing gym just because it’s a bit of a haul. Open up your comfort radius a little and start planning.
While the gym is an excellent venue to practice your skills and learn some of the finer points of belaying, bouldering, and lead climbing, there’s no official entrance exam that you can take to say that you are certifiably ready to climb outdoors. Outdoor climbing is a beautiful pastime and a wonderful adventure. The only entrance exam that matters is your own. Make sure you know what you’re doing and why you’re doing it. What knots are you tying on your top rope anchors? Why? Are you using locking carabiners on the masterpoint? Do you know how to clean anchors? Are you confident you can safely climb the grade of the route you are on? Are you even confident you’re on the route you want to climb?
Outdoor climbing requires a lot of finesse and a far more nuanced and subtle understanding of climbing systems, equipment, and techniques. No amount of time in the gym will necessarily guarantee that you are ready to climb outdoors. Then again, with the right mentor, a first-time climber can have a completely safe and enjoyable experience climbing outdoors without ever stepping foot in the gym. If you can’t find a mentor, consider going through a guiding service. Most gyms have some kind of guided outdoor climbs, or you can find outdoor-climbing specific guide services almost anywhere that there are good rocks to climb on.
See Our Climbing Gear Reviews See Our Rock Climbing Checklist
")