Photo Credit
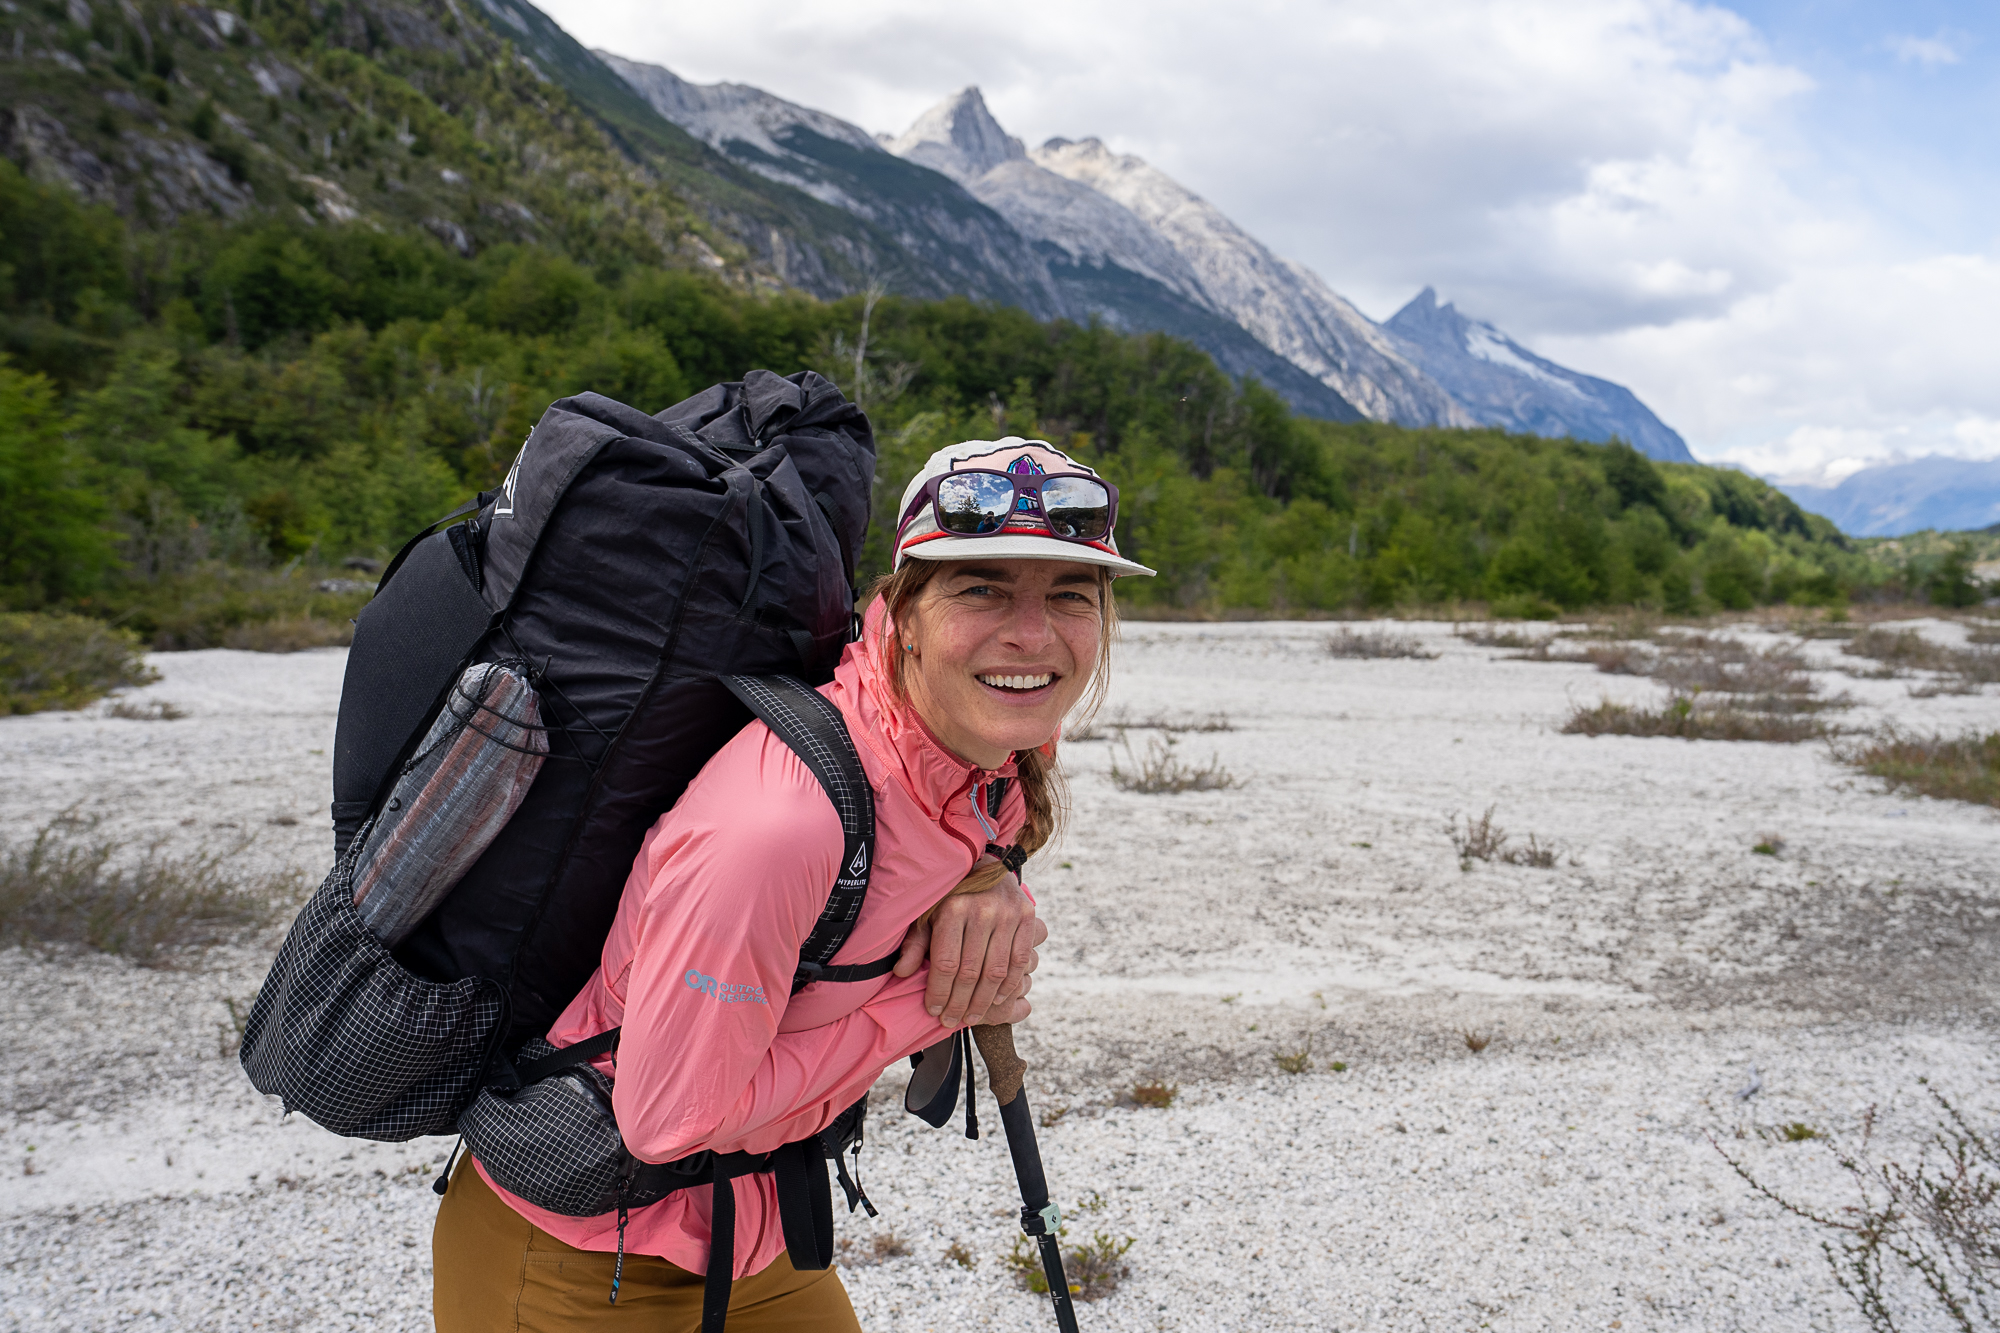
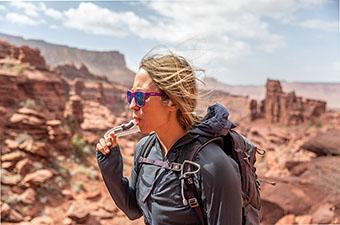
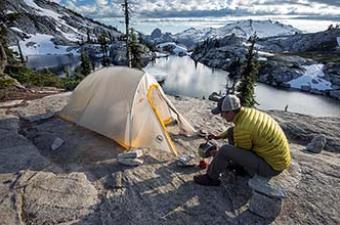
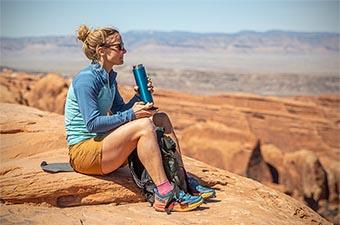
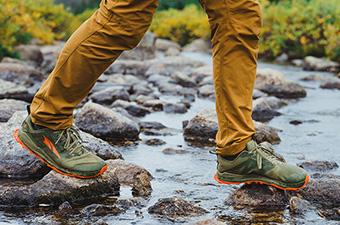
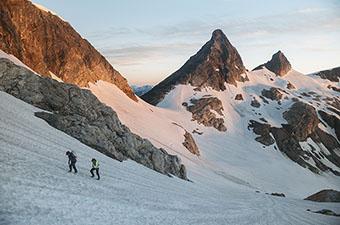
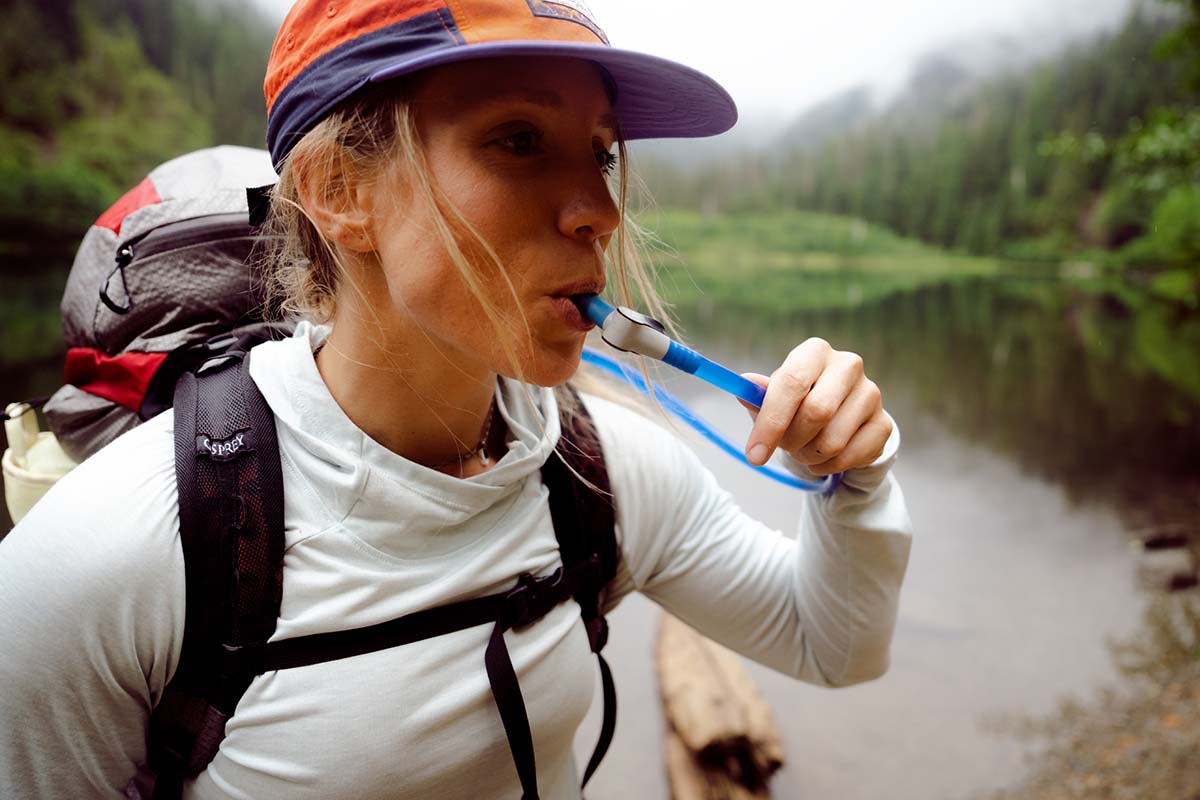
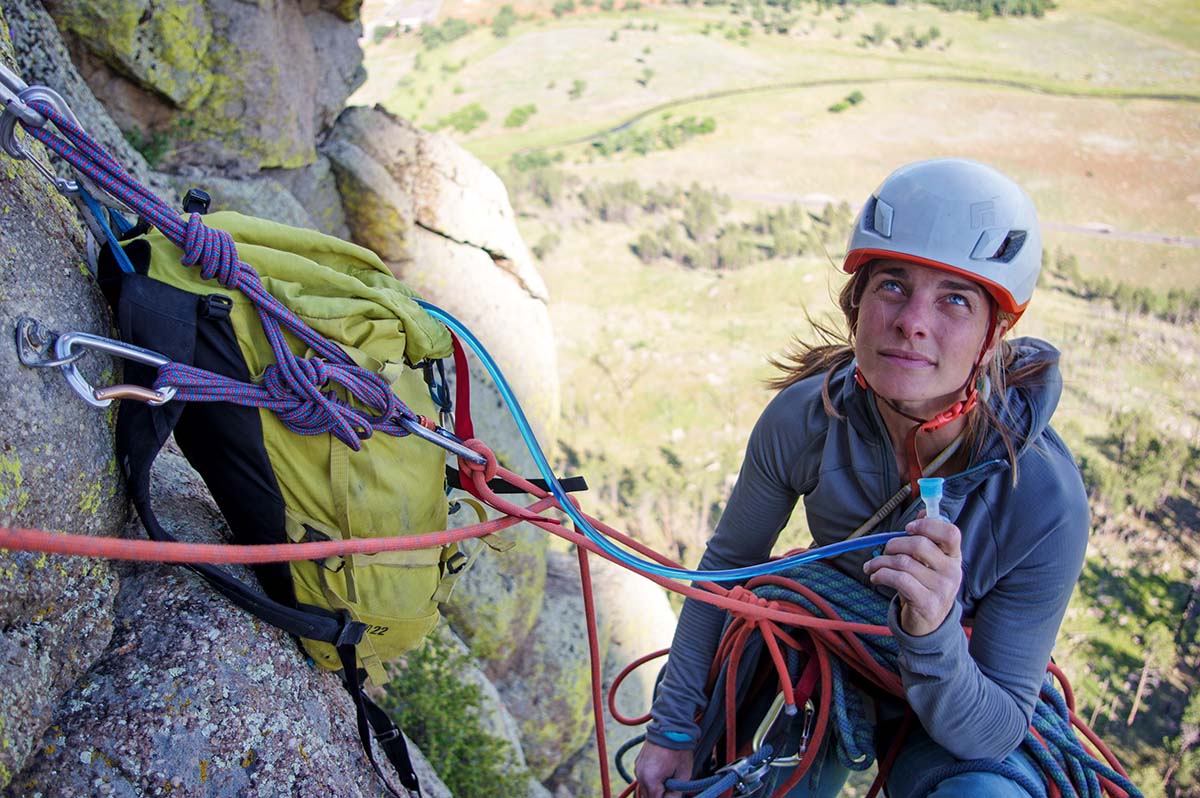
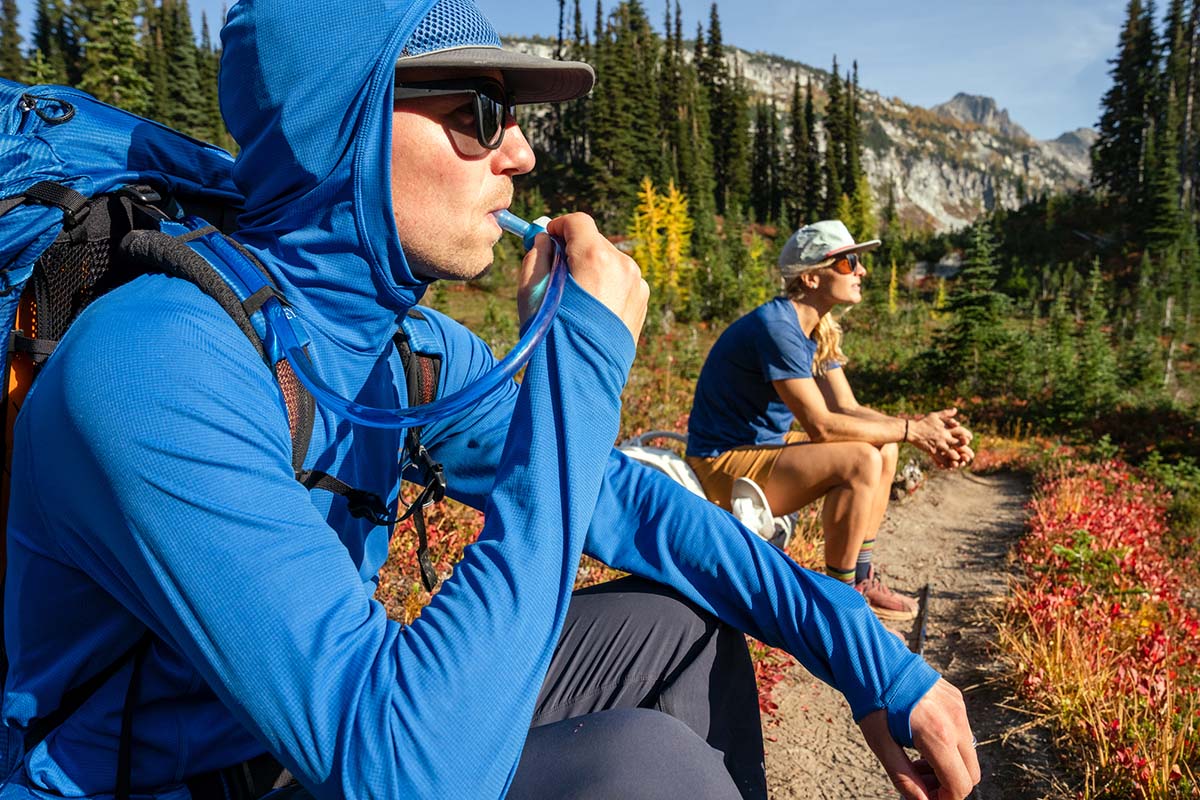
Whether we’re hiking, biking, running, or climbing, on-the-go hydration is an essential part of our kit. There’s simply no better way to encourage drinking consistently during activity, which is vital to performance and enjoyment (after bonking one too many times, we’ve certainly learned this the hard way). You can use a water bottle stuffed into a backpack pocket or mounted on a bike frame, and many runners like to drink from soft flasks, but in our opinion, nothing matches the convenience of a hydration reservoir. Below we break down the best hydration bladders of 2025, ranging from ultralight and packable models to fully featured reservoirs and insulated designs. For more, see our comparison table and buying advice below the picks.
Editor’s note: We updated this guide on June 5, 2025, to update information about our testing practices below the picks and sweep the guide to ensure all prices, write-ups, and specs are up-to-date.
 Closure: Slider
Quick disconnect: Yes
Capacities: 2, 3L
What we like: Great feature set and convenience in a durable and reliable build.
What we don’t: Rigid backer adds weight and bulk.
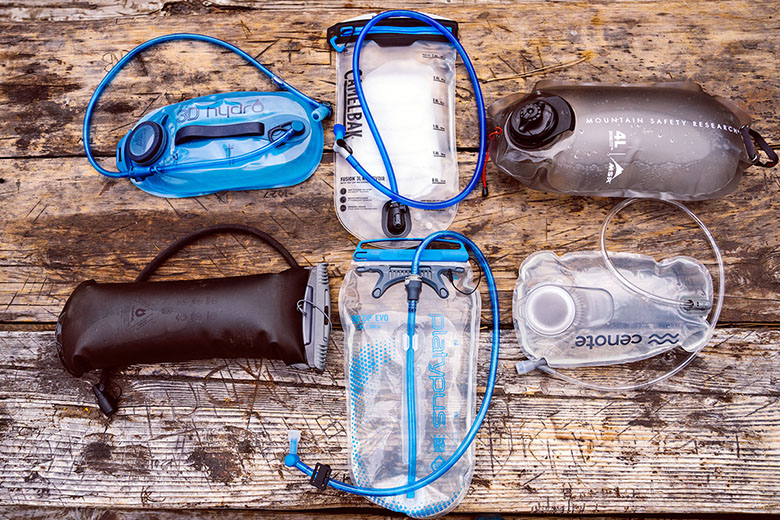
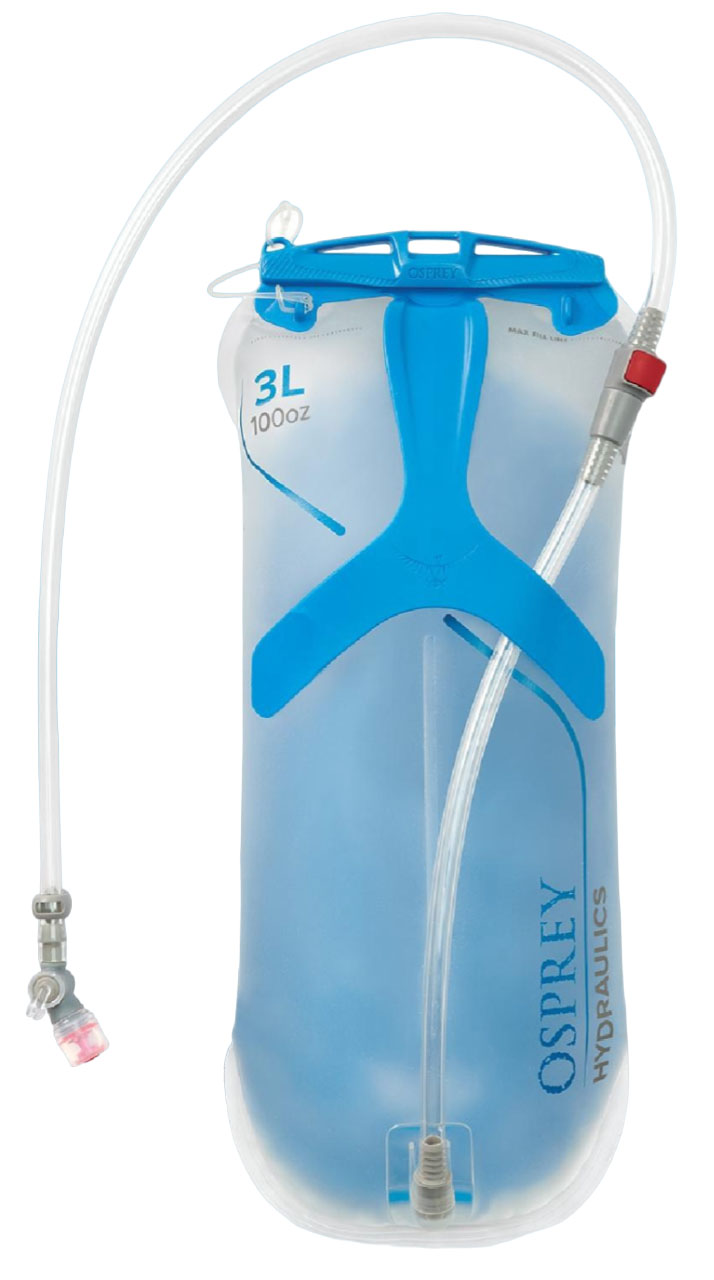
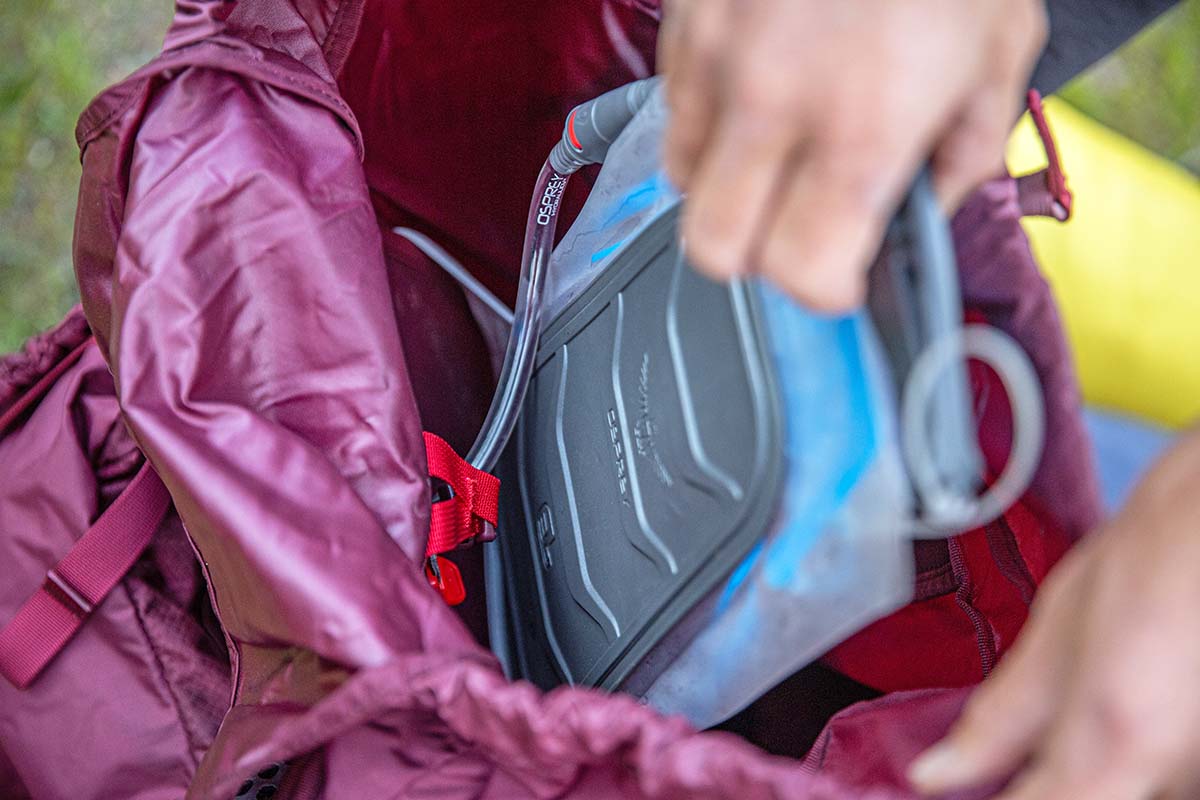
There are a variety of quality hydration bladders to choose from, but the recently redesigned Osprey Hydraulics is our top pick thanks to its ease of use, well-rounded feature set, and durable build. The Hydraulics uses a supple and opaque TPU film (our older version has remained puncture-free throughout the years) and includes a quick-disconnect fitting, bite valve with twist closure, and magnetic hose clip—features we’ve come to expect in a high-quality design. Combined with a new front handle, the full-width opening makes filling, pouring, and cleaning a breeze (we prefer it to round-mouthed reservoirs), and offers a reliably watertight seal via a minimalist slider. Finally, unlike most competitors, the Hydraulics tacks on a rigid backer plate, which makes it easier to slide behind gear into a full backpack. Added up, the Osprey is a convenient and fully featured choice for most backpackers.
Quick-disconnect fittings (also known as quick-release or Plug-N-Play valves) are fairly standard in 2025, but we especially love that the Hydraulics’ is positioned at the top of the bladder. This makes it simple to release and reconnect without having to rifle around at the bottom of your pack. It is worth noting that Osprey’s rigid backer adds weight and bulk (unlike many others, you can’t roll it up when empty), and also makes the bladder difficult to invert for easy dishwasher cleaning. And at $50 for the 3-liter version ($48 for the 2L), it’s pricier than much of the competition. But the Hydraulics puts it all together better than most, and—like most bladders here—is built to endure season after season of hard use. For a more minimalist option, an LT version is also available in 1.5 and 2.5-liter capacities ($40 and $42), which swaps out the rigid backer for two internal baffles but retains the same overall design and features.
See the Osprey Hydraulics 3L
 Closure: Twist cap
Quick disconnect: No
Capacities: 2, 3L
What we like: Gets the job done for $20-$30 less than most of the competition.
What we don’t: No bite valve shutoff, no quick disconnect, no cap attachment.
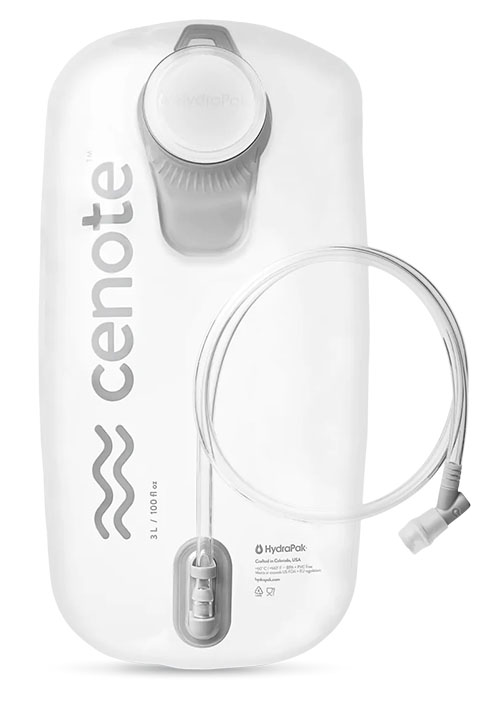
Most hydration bladders will cost you around $40 to $50, but you can save with HydraPak’s Cenote here. For just $25 for the 2-liter version (and $27 for the 3L), the Cenote is a simple and lightweight solution that—unlike most budget designs found on Amazon—comes with a great warranty via HydraPak’s Beyond Lifetime Guarantee. Not only that, but it’s made in the U.S., which will certainly appeal to some shoppers. We don’t love that the cap comes free of the reservoir (making it easy to drop or lose) and the drink tube doesn’t features a convenient quick disconnect, but for the entry-level user who just gets out a few times a year, the Cenote will get the job done.
However, there’s one key reason we’d caution against the Cenote: The bite valve does not include a shutoff mechanism. We’ve simply had too many experiences with hydration bladders leaking through the bite valve, and we’re especially wary of this for new users who haven’t yet learned the caution required. Plus, the solution is so simple: Get a bite valve that features an on/off switch. HydraPak does sell their Comet Bite Valve separately for $8, but at that point, your Cenote is costing you $33—and you might as well spend up for a more premium design. But if you’re really looking to pinch pennies or don’t mind the possibility of a leak, the Cenote gets our vote as the best combination of affordability and quality. For another budget option, check out the Gregory Hydro 2L, which retails for $35 and features a lever closure on the valve.
See the HydraPak Cenote 2L
 Closure: Slider
Quick disconnect: Yes
Capacity: 3L
What we like: Ultra durable and highly insulated.
What we don’t: Bulky and heavy; quick-disconnect is a pain to access.
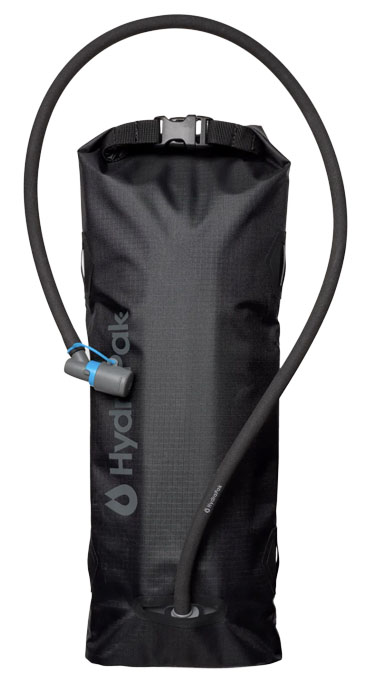
Taking the cake for both the most durable and best insulated hydration bladder here is the HydraPak HydraSleeve. The HydraSleeve gives HydraPak’s Shape-Shift bladder a cold-weather treatment, tacking on an insulated HydraFusion tube, bite valve cover, and insulated sleeve. The sleeve is the main event here: Not only is it highly protective with a waterproof shell and roll-top closure, foam, and reflective liner, but it features a burly 210-denier nylon and four lash points for securing to your pack, boat, sled, or bike. Whether you’re adventuring in the cold (or extreme heat) or want a durable hydration bladder that can take a beating, the HydraSleeve is one tough cookie.
With a fairly bulky build, the HydraSleeve is a difficult choice for weight- and space-conscious missions like backcountry skiing and ice climbing—in most cases, we’d recommend HydraPak’s more streamlined Force instead (pro tip: wrap it in an insulated jacket in your pack). On the other hand, you’ll probably want to use a water bottle (and insulated sleeve) in truly Arctic-like conditions. Finally, it’s worth noting that the HydraSleeve’s quick-disconnect can be hard to reach inside the sleeve—on one occasion, we pulled the hose off trying to access the port, drenching all of our gear in the process. Gripes aside, the HydraSleeve is a great design for temperatures as low as the single digits, and the durable build is at home in the elements. CamelBak’s Stoaway 3L Insulated is a relatively similar design that earns brownie points for its lower price point, although keep in mind that its zippers can ice up in the cold.
See the HydraPak HydraSleeve 3L
 Closure: Slider
Quick disconnect: Yes
Capacities: 2, 3L
What we like: All the features you need for minimal weight and bulk.
What we don’t: The HydraPak Velocity is a better pairing with a running vest.
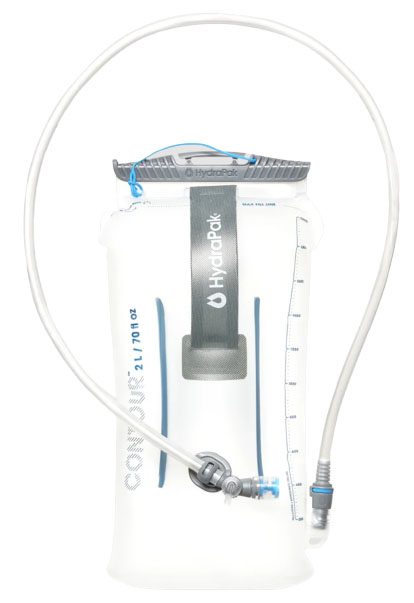
For endurance athletes looking to push the pace, a hydration bladder like the Osprey Hydraulics above has a bit too much going on. HydraPak’s Contour here is our favorite design for minimalists, with fewer features and significantly less bulk and weight. You still get HydraPak’s high-quality material and components, including a quick disconnect, Comet bite valve, and integrated handle, but the 2-liter Contour checks in at just 5 ounces and compresses into a small package (for comparison’s sake, the Hydraulics 3L above is 8.3 oz. and cannot roll up). And with a 3D base for easy filling, baffles that help to keep water from sloshing, and included magnet clip, it’s a high-performance design, too. HydraPak also included a tab on the inside that helps turn the bladder inside out and doubles as a hanger for drying.
While we have minimal gripes with HydraPak, there are a few ultralight competitors also worth mentioning here. First, Platypus’ Hoser below is the lightest and most packable bladder on our radar, checking in at just 3.6 ounces for the 2-liter version thanks to its baffle-free reservoir, limited feature set, and small opening that doubles as a port (but as we detail in its write-up, quality and ease of use are disappointing). HydraPak’s Velocity bladder (4.1 oz.) is a closer contender, with many of the same strengths of the Contour in a slightly more streamlined 1.5-liter design that’s a better fit for most running vests. But for the best mix of versatility, durability, and features, the Contour is our favorite ultralight and packable bladder of the year.
See the HydraPak Contour 2L
 Closure: Twist cap
Quick disconnect: No
Capacities: 2, 4, 6L
What we like: High-capacity water storage with on-the-go capability.
What we don’t: Lacking in structure; compatible tube and bite valve are unavailable at the time of publishing.
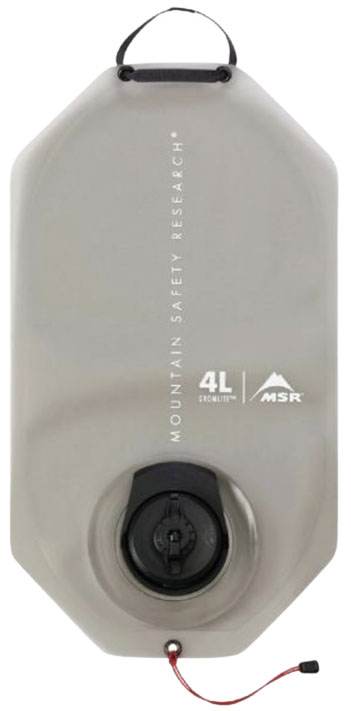
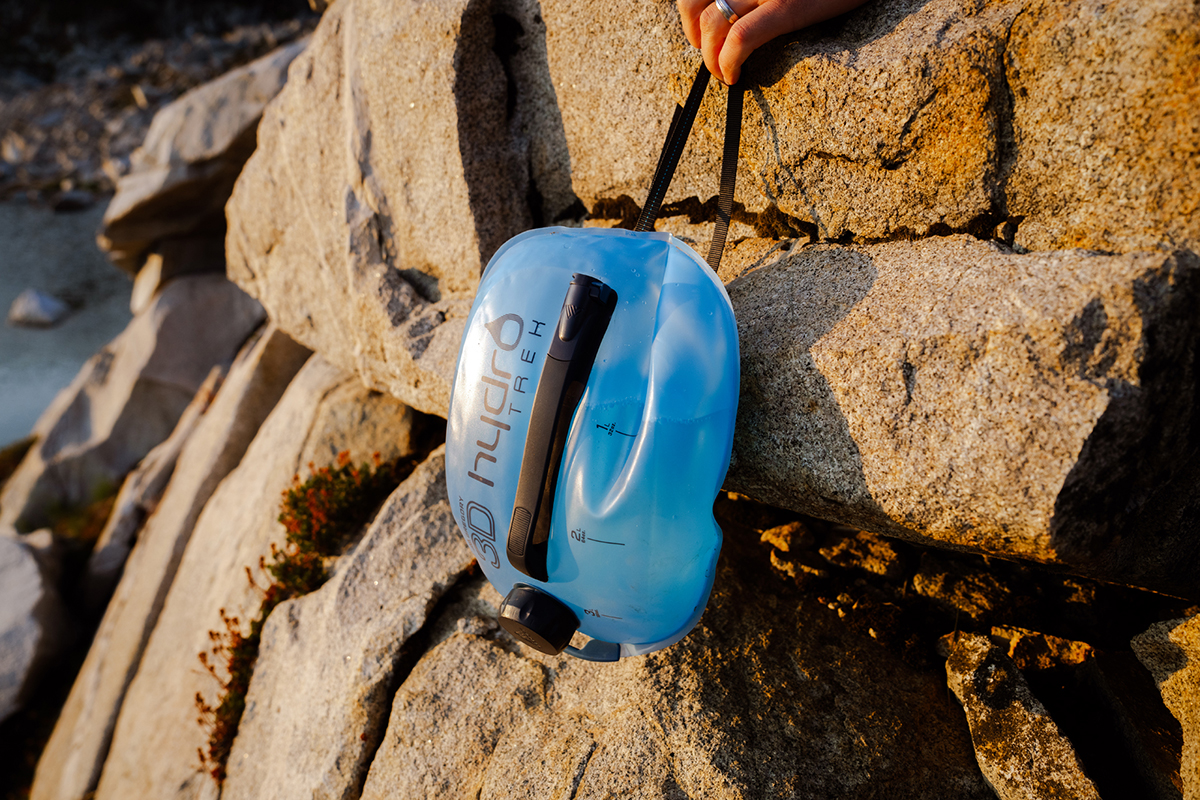
MSR’s entry is a bit of an outlier on this list, but it’s nevertheless one of our favorite water storage tools for multi-day endeavors. The DromLite Bag is a simple yet tough reservoir with a hang loop on one end and a 3-in-1 twist cap on the other. Fill the bag via the large circular opening, hang it at camp, and you’ve got a great setup (with both low and high flow rates) for drinking, filling pots, hand-washing, or even taking a quick rinse after a full day in the sun. All told, the DromLite is one of our favorite setups to bring backpacking with a group thanks to its large capacity, multi-functional cap, and hardwearing build.
We're sad to see that MSR's Hydration Kit is currently unavailable. Comprising a 42-inch tube with a bite valve, the kit turns the DromLite into an on-the-go hydration bladder, which adds a lot of versatility. Another complaint is that the DromLite is lacking in structure. In fact, instead of trying to squeeze it into our backpack’s hydration sleeve, we end up just throwing it on top of the rest of our pack’s contents, which certainly lacks the integrated feel many folks look for in a hydration bladder. But for the right user, it’s an impressively ultralight and packable setup (it folds down to the size of its cap) with endless utility. And an honorable mention here goes to the Gregory 3D Hydro Trek 3L, which includes a push-button “tap” for convenient basecamp use.
See the MSR DromLite Bag 4L
 Closure: Twist cap
Quick disconnect: Yes
Capacities: 2, 3L
What we like: Dries out more completely than most bladders (great for eliminating grime buildup).
What we don’t: Bulky and overly featured for some.
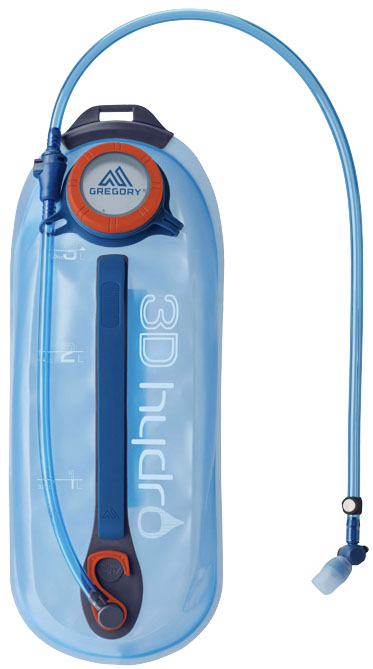
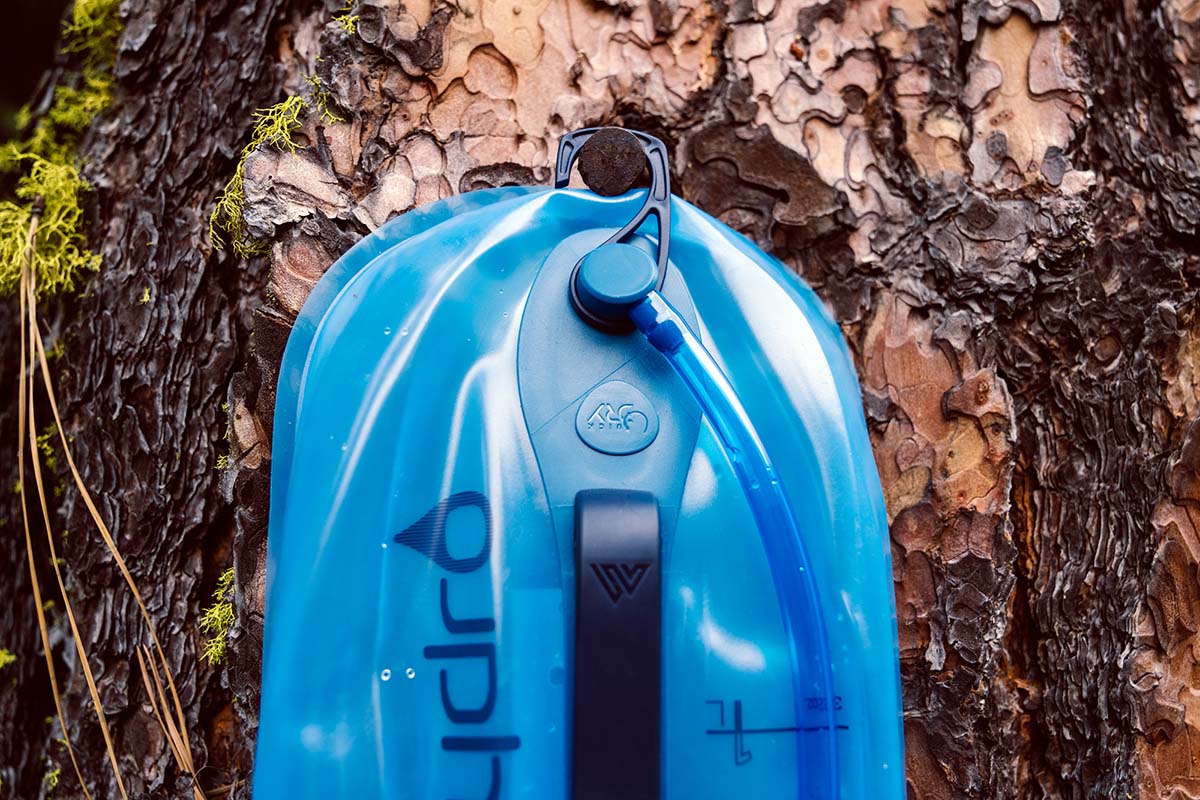
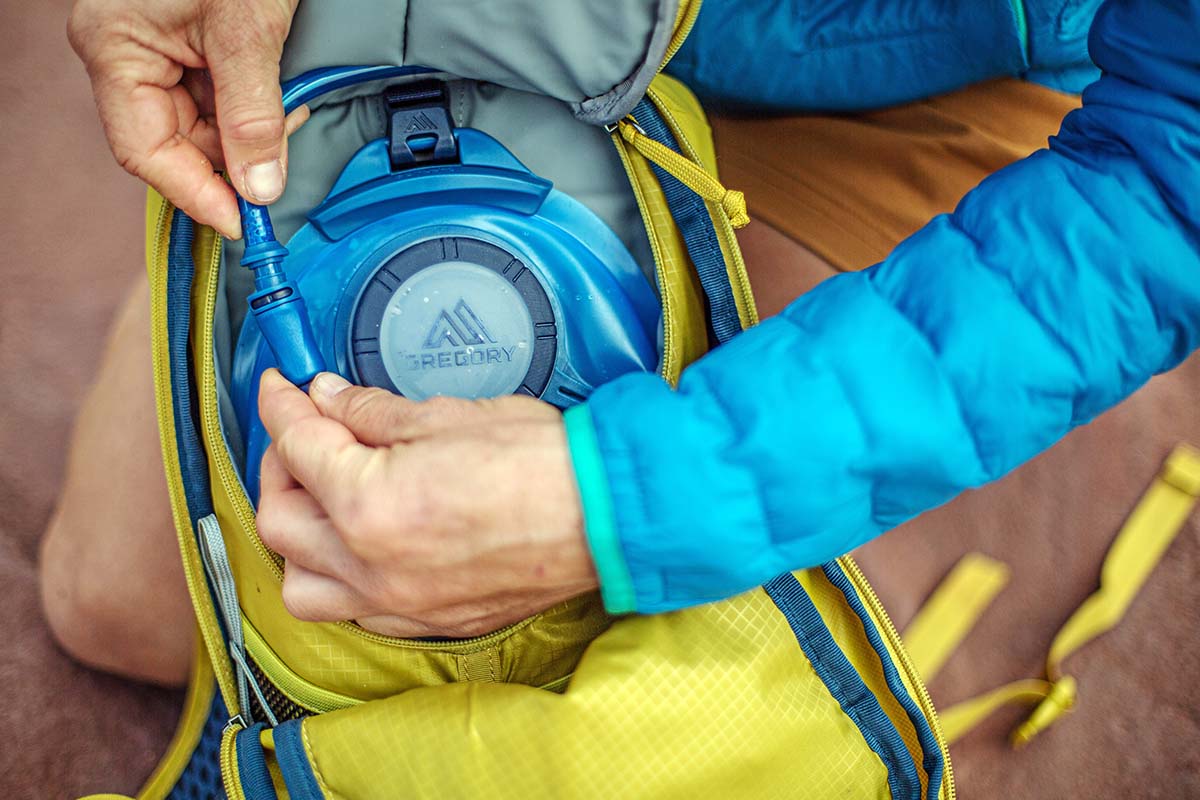
Gregory’s 3D Hydro bladder looks a lot different than offerings from HydraPak and Osprey (which are also made by HydraPak), but there’s a lot to like about the design. The material is supple yet holds a fairly rigid shape, which is surprisingly helpful: It’s easy to fill, slides in and out of a pack better than softer bladders, and dries out efficiently. And the features don’t end there. Gregory also includes a long handle, quick-disconnect at the top (similar to the Hydraulics above), magnet on the bite valve that secures to the included sternum strap attachment, and a unique, easy-to-toggle on/off button that ensures against leaks.
While the 3D Hydro isn’t reversible like some HydraPak designs, it’s still one of the easiest bladders to clean. The mouth is wide enough to fit most bottle brushes, the reservoir props open when empty (ideal for airflow), and it doesn’t get much more convenient than the built-in drying hanger at the base. If you’re a stickler for cleanliness and want a bladder that will dry out completely between uses (valuable for eliminating grime buildup), the Gregory is a good bet. But while these features are great for day hikers and casual backpackers, keep in mind that they do add a considerable amount of bulk.
See the Gregory 3D Hydro 3L
 Closure: Twist cap
Quick disconnect: Yes
Capacities: 1.5, 2, 3L
What we like: Super high flow; wide mouth makes cleaning easy.
What we don’t: Dated design lacks a few useful features of the options above.
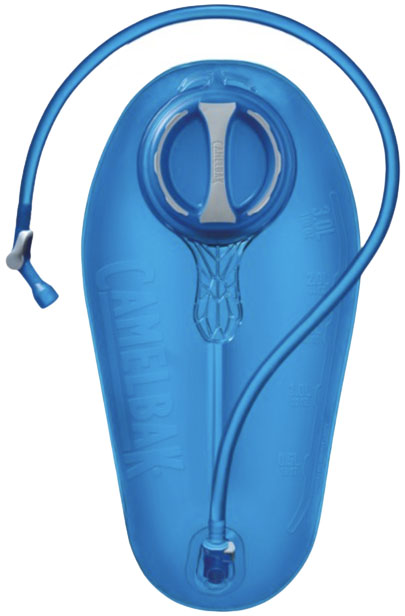
CamelBak spearheaded the on-the-go hydration category decades ago, so it’s a bit of a surprise to see them so far down our list. But don’t read into it too much: The Crux is a durable and easy-to-use hydration bladder and one of our consistent go-tos for hiking, backpacking, and mountain biking. One of its standout features is the wide tube and high-flow bite valve, which combine to deliver a heavy stream of water at each sip (we find the Crux really fun to drink out of because of this). What’s more, the quick disconnect, large handle, and wide mouth make the Crux one of the easiest bladders to fill (just make sure you separate the back material from the mouth, as it has a tendency to form a seal and pool water), and we love that we can reach our arm all the way to the bottom of the bladder while cleaning.
But while the Crux is a solid choice, it’s a bit more archaic than the more modern options above. CamelBak hasn’t made a ton of changes to the design over the years, so you don’t get innovative touches like a reversible reservoir (for top-shelf dishwasher cleaning), conveniently placed quick disconnect (theirs is at the base), or more secure slider closure (we highly recommend inverting the Crux after filling to make sure its twist cap won't leak). And unlike much of the competition, it isn’t particularly packable with its bulky handle and cap. But it’s hard to knock the Crux’s long track record of success, and at $42 for the 3-liter model, the price is competitive, too.
See the CamelBak Crux 3L
 Closure: Slider
Quick disconnect: Yes
Capacities: 2, 3L
What we like: Impressively tough; unique all-black design.
What we don’t: Not a great cold-weather choice.
The fourth and final HydraPak product on our list is the Force 3L, which offers a nice alternative to the HydraSleeve above for those looking for a durable, insulated bladder. Both models feature the same HydraFusion drink tube, but the Force drops the durable sleeve and adds a dose of toughness straight to its reservoir. The result is an ultra-rugged bladder that can really take a beating, whether you’re backpacking, hunting, or on the battle field (our Force advertises a “military grade” designation on its backside). And in line with its rugged design, the Force also features a dust cover for the bite valve and all-black/grey components, which is great news for those trying to blend in with their environment.
While the HydraSleeve might have a fighting chance in keeping your water from turning to ice in sub-freezing conditions (thanks to the insulated bladder), the Force shouldn’t be confused for a cold-weather choice. The insulated tube certainly won’t hurt on sub-freezing days, but most users will experience its benefits in particularly hot weather (and in terms of durability). It’s also worth noting that the Force was just updated: It’s now shorter and stouter (a big improvement from the previous version’s long and skinny shape) and tacks on an ultra durable handle and updated bite valve that’s easier to lock and unlock. We’ve got to hand it to HydraPak for making one heckuva durable bladder (for a fairly low weight to boot), which should appeal to many.
See the HydraPak Force 3L
 Closure: Slider
Quick disconnect: Yes
Capacities: 1.5, 2, 3L
What we like: Durable build and a great feature set.
What we don’t: Expensive and fairly bulky.
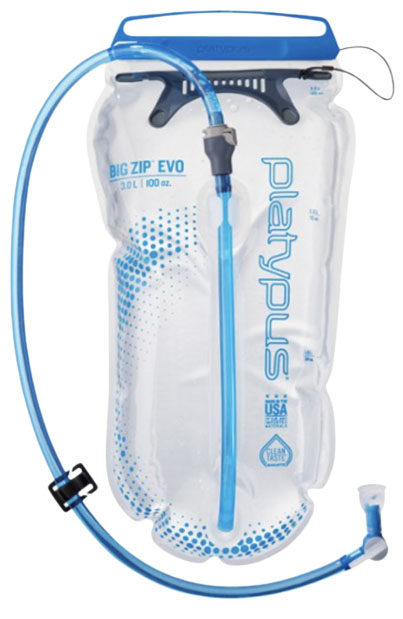
Platypus is a leader in water storage and filtration, and certainly a brand to consider when looking for a hydration bladder. The Big Zip Evo is their premium offering, available in 1.5, 2, 3-liter, and lumbar (2L) capacities and featuring modern components like a quick disconnect at the top, handle for easy filling, and bite valve shutoff. You also get a drink tube that’s 1/16-inch wider than HydraPak’s designs, which translates to a noticeably high flow rate (similar to the Crux above). Finally, with a more rigid, transparent material, the Big Zip Evo is very durable and feels a bit more robust than the suppler bladders here.
At $60 for the 3-liter version, the Big Zip Evo is just about as pricey as our chart-topping Hydraulics above, but in practice we haven’t found Platypus reservoirs to be as reliable as those from Osprey. As mentioned in the Hoser write-up above, we’ve had issues with Platypus products leaking at the seams; on the other hand, we also have a Platy reservoir that’s still going strong after six years of heavy use. We give the edge to the Osprey for its more supple build and strong track record of success, but the Big Zip offers similar convenience (thanks to its rigid internal baffle and large slider) at a slightly lower price and weight. You likely won’t be disappointed with the Big Zip Evo, although minimalists should look elsewhere.
See the Platypus Big Zip Evo 3L
 Closure: Zip
Quick disconnect: Yes
Capacities: 2, 3L
What we like: High-end reservoir with rigid backplate and convenient feature set.
What we don’t: Expensive; zipper seems more prone to failure than standard slider design.
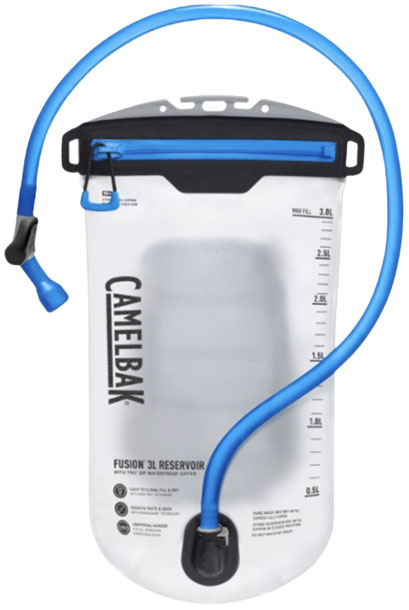
CamelBak’s Crux above is their tried-and-true hydration bladder, but the innovative Fusion represents a step forward for the brand—or, at minimum, a step sideways. The Fusion features a unique waterproof zip closure that easily slides open and closed, offering a nice alternative to slider designs like the Big Zip Evo and HydraPaks above. Similar to the Osprey Hydraulics, a rigid backplate helps the bladder hold its shape without the need for an internal baffle (which makes for easier cleaning), and you get all the other features we look for in a high-end reservoir, including a quick disconnect, on/off lever on the bite valve, and integrated pinch-grips that make for easy filling.
We certainly give kudos to CamelBak for trying to do something different, but we’re not sure that the Fusion’s zipper has any merit over a more secure slider—and it seems to have a lot more potential to fail over time. We haven’t spent enough time with our reservoir yet to know, but we’re also guessing it’ll need to be consistently maintained with lubricant, too. The 3-liter Fusion is also noticeably wide—especially at the top—which will lead to compatibility issues with various packs (we could not fit it into our Osprey Tempest 20’s sleeve). And finally, $62 is a lot to spend on a bladder with these shortcomings. Added up, the Fusion is a cool idea, but there are far better values above.
See the CamelBak Fusion 3L
 Closure: Twist cap
Quick disconnect: No
Capacities: 1, 1.8, 2, 3L
What we like: Ultralight and versatile.
What we don’t: Limited feature set and durability.
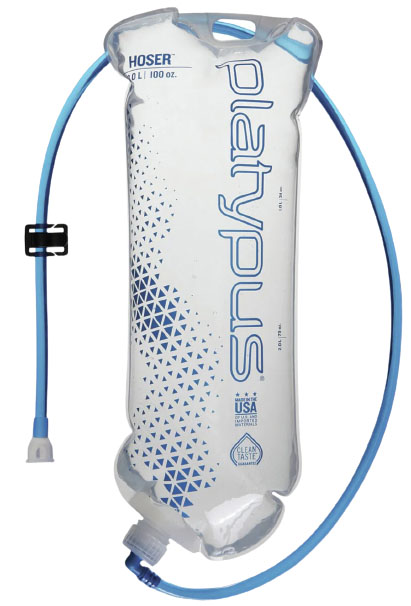
Above all else, the Platypus Hoser is ultralight and packable—if that’s what you’re looking for, the Hoser isn’t a terrible place to start. But there are a number of things that the Hoser isn’t: It isn’t fully featured (you don’t get a quick disconnect or bite valve shutoff), it isn’t particularly durable (the first one we ordered sprung an inch-long leak in the seam immediately), and it isn’t at all easy to clean. And at $40, it’s also not that great of a value, considering a high-end and featured design like the HydraPak Contour above is only a bit more expensive.
But like the DromLite above, the Hoser can play double duty as a simple water storage bag: Platy offers a screw-on cap or push-pull cap that can fit on its standard 28-millimeter opening. It’s also compatible with many water filters (such as the Platypus QuickDraw and Sawyer Squeeze), meaning you can easily convert it into a gravity system. In other words, the Hoser is a fairly versatile piece for those who like to geek out on hydration and filtration setups, and as the lightest design here it will have some appeal for ounce-counters. But for a dedicated hydration bladder, we think there are more well-rounded designs.
See the Platypus Hoser 2L
 Closure: Twist cap
Quick disconnect: Yes
Capacities: 1.5, 2, 3L
What we like: The features of a premium hydration bladder for less than $20.
What we don’t: Questionable quality and limited customer service.
We don’t always recommend off-brand products specific to the Amazon market, but the Cherainti Hydration Bladder is at least worth mentioning here. Thus far, the budget models on our list have offered minimal savings alongside a considerable amount of performance downgrades, which make them an especially tough sell when you can spend $10 more for a premium bladder. It’s for this reason that the Cherainti stands out: Priced at just $15 on Amazon at the time of publishing and boasting user-friendly features like a locking bite valve, dust cover, and quick-disconnect tube, it’s a truly justifiable value pick.
Of course, it’s good to keep expectations low with off-brand gear: The Cherainti likely won’t last as long as the more premium bladders here, and the components certainly don’t feel as high-end. What’s more, you don’t get the kind of customer service or return policies that most outdoor companies offer. But for every-so-often use or if you want to try out a hydration bladder in a low-commitment way, the Cherainti offers a lot of bang for your buck.
See the Cherainti Hydration Bladder 2L
| Hydration Bladder | Price | Closure | Quick-Disconnect | Capacities | Weight | Insulated |
|---|---|---|---|---|---|---|
| Osprey Hydraulics 3L | $50 | Slider | Yes | 2, 3L | 8.3 oz. | No |
| HydraPak Cenote 2L | $25 | Twist cap | No | 2, 3L | 4.8 oz. | No |
| HydraPak HydraSleeve 3L | $68 | Slider | Yes | 3L | 10.8 oz. | Yes |
| HydraPak Contour 2L | $45 | Slider | Yes | 2, 3L | 5 oz. | No |
| MSR DromLite Bag 4L | $43 | Twist cap | No | 2, 4, 6L | 5.1 oz. | No |
| Gregory 3D Hydro 3L | $53 | Twist cap | Yes | 2, 3L | 7 oz. | No |
| CamelBak Crux 3L | $42 | Twist cap | Yes | 1.5, 2, 3L | 8 oz. | No |
| HydraPak Force 3L | $48 | Slider | Yes | 2, 3L | 6.3 oz. | Yes (tube only) |
| Platypus Big Zip Evo 3L | $60 | Slider | Yes | 1.5, 2, 3L | 6.5 oz. | No |
| CamelBak Fusion 3L | $62 | Zip | Yes | 2, 3L | 5.5 oz. | No |
| Platypus Hoser 3L | $40 | Twist cap | No | 1, 1.8, 2, 3L | 3.8 oz. | No |
| Cherainti Hydration Bladder 2L | $15 | Twist cap | Yes | 1.5, 2, 3L | Unavail. | No |
Every adventure we embark on—from hiking to running, biking, and climbing—requires a way to stay hydrated, and our team loves the convenience of a hydration bladder. Former senior editor Jenny Abegg started this list with 12 picks in 2023. An avid trail runner, alpine climber, and all-around mountain athlete, Jenny loves taking the trail less traveled and is always looking to maximize efficiency while on the move. Senior Editor Chris Carter took over this guide in early 2025. A passionate long-distance thru-hiker, big wall climber, and desert roamer, Chris has put his fair share of hydration bladders to the test all over the world. He knows what makes a vessel worthy, and won't let just any ol' jug land in this list.
In deciding on the 12 picks above, we relied almost exclusively on performance in the field: How’s the flow rate? How does each bladder hold up over time? Did we experience any leaks? How easy is it to fill? We also analyzed specs like capacity, weight, and price, prioritizing designs that strike an effective balance. Final considerations include features (quick-disconnect fittings are very handy for refilling), closure type (sliders are typically the easiest to clean, dry, and empty), and bite valve design. There’s no shortage of high-quality options to choose from in 2025, and rest assured we’ll continue putting the latest and greatest designs to the test to bring you our favorites.
If you ask us, a hydration bladder—also known as a hydration reservoir—is the best way to drink water during activity, whether you’re hiking, biking, running, climbing, or skiing. Heck, we also think it’s the best way to stay hydrated while driving, writing, reading, and watching TV. In most cases, it’s simply easier to drink from a tube than a water bottle. And when loaded into your backpack of choice, a hydration bladder offers hands-free, on-the-go water (or electrolyte drink) whenever you want it. All told, we’ve found that this setup allows us to stay much more hydrated than drinking from a water bottle, particularly when we’re on the move.
Most hydration bladders come in a few different capacities, generally ranging from 1.5 liters to 3 liters. While larger-capacity designs are certainly the most versatile, they might not be the runaway choice for everyone: The extra space leads to more bulk, and a half-full load can place the water weight lower rather than spread out along the length of the back. Because of this, most will want to opt for the capacity they think they’ll most use. The majority of hikers and bikers can get away with a 2-liter bladder, and running-specific designs are often 1.5 liters in capacity. And while we don’t often carry 3 liters of water (that’s 6.6 lb. of added weight!), we often opt for a 3-liter bladder for backpacking trips, as the extra capacity can be helpful when camping away from water sources. To make sure a partially full bladder is slosh-free, simply flip it upside down (so that the water is no longer gathered around the hose port) and suck through the bite valve until you’ve removed all the air.
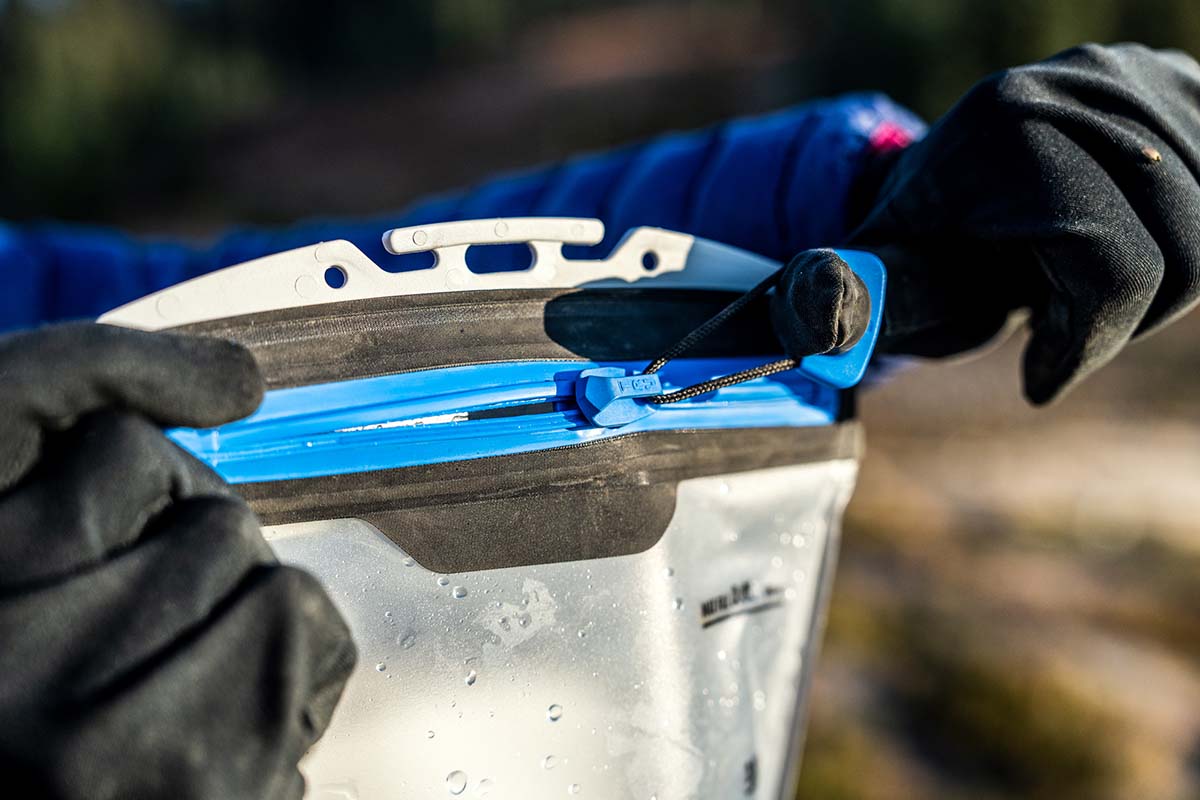
There are two main styles of hydration reservoirs—those that feature a top opening that seals with a slider (or in the case of the CamelBak Fusion, a zip), and those with a twist-cap closure (generally on the front, although the Platypus Hoser’s is at the base). Both are time-tested designs, but differ slightly in terms of functionality, especially when it comes to filling, emptying, and cleaning.
In general, reservoirs with sliders are the easier of the two to clean and dry—the openings are wide enough to fit your whole arm in, and some offerings from HydraPak can even be turned inside out and placed in a dishwasher. Conversely, you probably won’t even be able to get your hand inside twist-cap designs like the Gregory 3D Hydro Reservoir, Platypus Hoser, and HydraPak Cenote (mercifully, CamelBak’s mouths are a lot wider). There are a lot of ways to clean a hydration reservoir (including cleaning tabs, scrub brushes, drying racks, etc.), but the larger opening and reversible design certainly makes things easier.
We’ve also found slider-top reservoirs to be easier to empty, especially HydraPak models with pour shields (as Osprey calls them). This design allows you to remove the contents with precision, which helps when transferring water to a pot or other bottle. Conversely, twist-tops are imprecise and often have places where water can hide, which isn’t helpful when you’re trying to dry the reservoir out completely.
But while it feels like slider-top reservoirs win out in most metrics, twist-cap bladders are distinctly easier to fill, thanks to the integrated handle that holds the opening ajar. On the other hand, reservoirs with sliders rest in a shut position, so you’ll have to pry them open underneath the water source. Each manufacturer has come up with a solution for this, including CamelBak’s one-handed pinch-grip on their Fusion, or the handle on Platypus’ Big Zip Evo. You’re likely to learn the ways of whatever model you choose, but for those looking for the height of filling convenience, a twist-cap bladder might be your best bet.

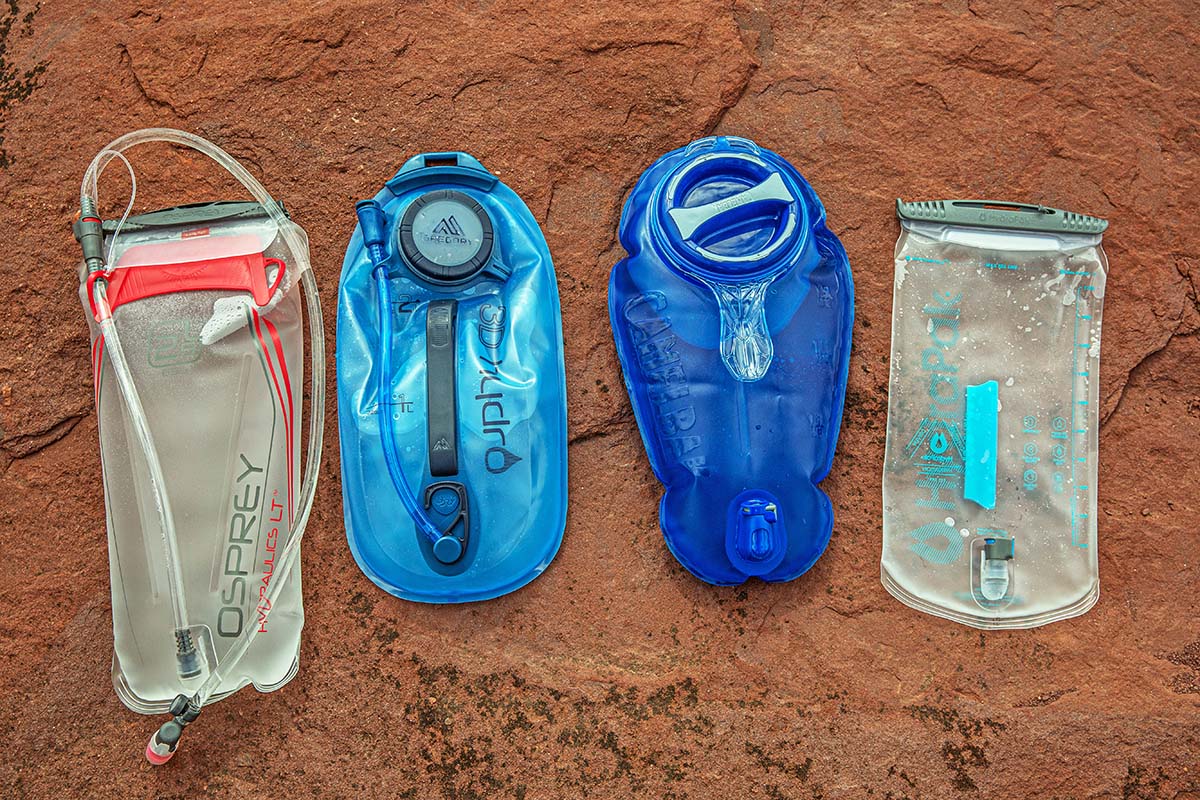
Hydration bladders are made from durable, BPA-free plastic that is meant to have a long lifespan if cared for properly. This plastic comes in various forms: For example, Platypus products are clear and rigid, while most HydraPak offerings are opaque with a slight bit of stretch. Both styles get the job done; we have both an old Platypus Big Zip and Osprey Hydraulics that are still going strong after six years of use. In fact, the vast majority of durability issues seem to be the result of user error—it’s important to keep your reservoir away from sharp objects like microspikes and trekking poles, and store it in a safe place between uses.
All that said, we have experienced the odd issue with leaking (particularly at the seams and joints) on various models across the board, including the HydraPak Contour, Platypus Hoser, and Platypus Big Zip Evo. In some cases, we’ve been able to repair these leaks with waterproof Flex Tape; at other times, we’ve taken advantage of companies’ generous warranty programs. If you tend to be particularly hard on your gear, it might be worth checking out models like the HydraPak Force—which is built with heavy-duty TPU—or the HydraPak HydraSleeve and CamelBak Stoaway, both of which feature durable nylon sleeves.
Keeping your hydration bladder clean is important both to your own health and the health of the bladder, especially if you commonly use sticky drink mixes like Nuun or Liquid IV. As we mentioned above, we’ve found reservoirs with slider closures to be easier to clean than those with smaller twist-cap openings. In most cases, you can reach your hand all the way inside, and many of these reservoirs are reversible and can be cleaned in the dishwasher. That said, most designs with twist caps aren’t a lost cause—we’ve had a lot of luck cleaning them with a long-armed dishwashing brush. The Platypus Hoser is an outlier given its very small opening, while the Gregory 3D Hydro excels: The bladder stays propped open when at rest (great for drying out) and even comes with a built-in hanger.
Most manufacturers also offer cleaning kits, which generally include a tube brush, bladder brush, cleaning tablets, and drying rack or hook (or some combination of the four). CamelBak's offering is a perfect example. We’ve found the tube brush to be particularly essential to removing buildup, but it’s easy to improvise with the other tools. In terms of cleaning solution, Platypus’ recommended DIY treatment includes mixing baking soda, water, and lemon juice together in your bladder, shaking, soaking, and rinsing thoroughly. To dry, we’ve found that it works to hang our reservoir from a clothesline or cabinet handle, or prop it on a plastic bag/bottle drying rack.
There’s also a bit of maintenance that goes into keeping a hydration reservoir running smoothly, particularly those with slider or zip tops or quick-disconnect fittings (which use an O-ring to create a seal). To keep these parts well lubricated, you’ll want to apply a greasy substance every few months of heavy use or after long bouts of storage. HydraPak includes a small packet of lubricant with their reservoirs, but you can also use Vaseline, lip balm, bees wax, or glycerin. And while this is best practice and will certainly help to prolong the life of your hydration bladder (especially the O-ring), most people (including us) have never performed maintenance on their reservoir, and they continue to work just fine.

By design, hydration bladders are not very heavy pieces of gear—the models on our list range from 3.8 ounces to 10.8 ounces. For most, the difference of a half-pound won’t matter, and the extra weight often translates to increased durability and capacity, along with additional features and ease of use. But if weight-savings or packability is a priority, you’ll want to consider a streamlined design. Minimalist bladders like the HydraPak Contour, MSR DromLite Bag, or Platypus Hoser can be especially handy for activities like climbing, running, or when you want to bring extra water carrying capacity but don’t anticipate using it all the time. Not only are these reservoirs lightweight, but they also feature streamlined designs systems that roll up into a small package. Keep in mind that they do come with sacrifices: The Hoser in particular lacks convenient features like a large opening, quick disconnect, and bite-valve shutoff.

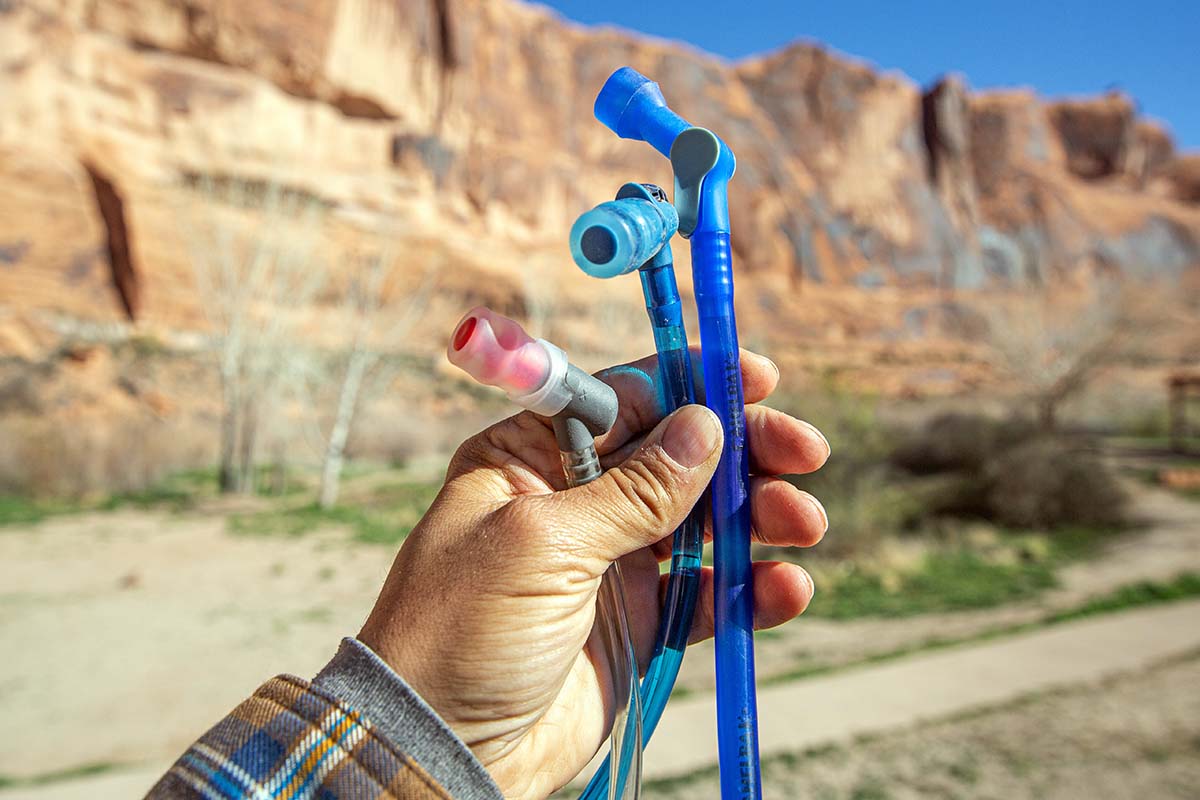
Bite Valve
Bite valves are not all created equal, so there are a few things to keep in mind when choosing between hydration reservoirs. The first is whether or not the valve has an on/off mechanism, which is almost a requirement in our opinion. Accidental leaks happen more than you would expect, whether you sit on your valve, place it underneath a heavy object, or have a flaw in the seal. Most of the bladders on our list feature bite-valve shutoffs, but the budget models (particularly the HydraPak Cenote and Platypus Hoser) do not. Adjustable bite valves generally use a twist or switch mechanism (although Gregory currently uses a button); we’ve found switches such as those on the Platypus Big Zip Evo and CamelBak Crux to be the easiest to operate, as twist designs can be difficult to adjust with one hand.
It’s also worth considering whether you want a cover for your bite valve. Covers are especially useful for keeping your valve from freezing, but they also protect against dirt and other debris. Some bladders (including the HydraPak Force and HydraSleeve) come with covers already installed on the bite valve, but they can also be purchased separately and added to your setup. We generally don’t like a valve cover due to its added bulk and the extra step of removing and putting it back on, but they’re almost essential for winter use (when paired with an insulated tube).
The last factor to consider here is a bite valve’s flow rate, or how much water comes out with each sip. Generally speaking, we’ve found that Platypus and CamelBak’s designs dispense a lot of water, while HydraPak’s bite valves (including those on the Osprey Hydraulics reservoir) are slightly more conservative. Brands like to tout a fast flow rate as a selling point, but in the end it’s completely a matter of personal preference. All of the bladders on our list are easy to drink from and dispense water just about as fast as we can drink.
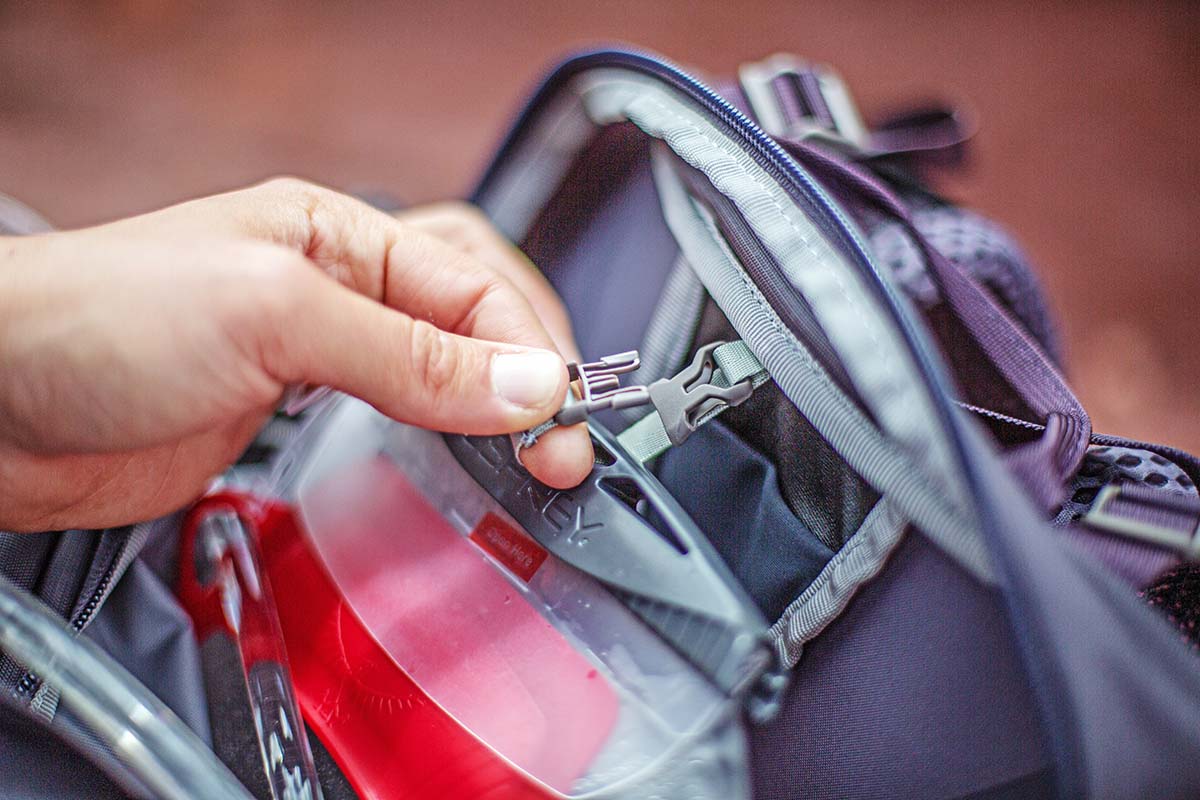
Quick-Disconnect Fitting
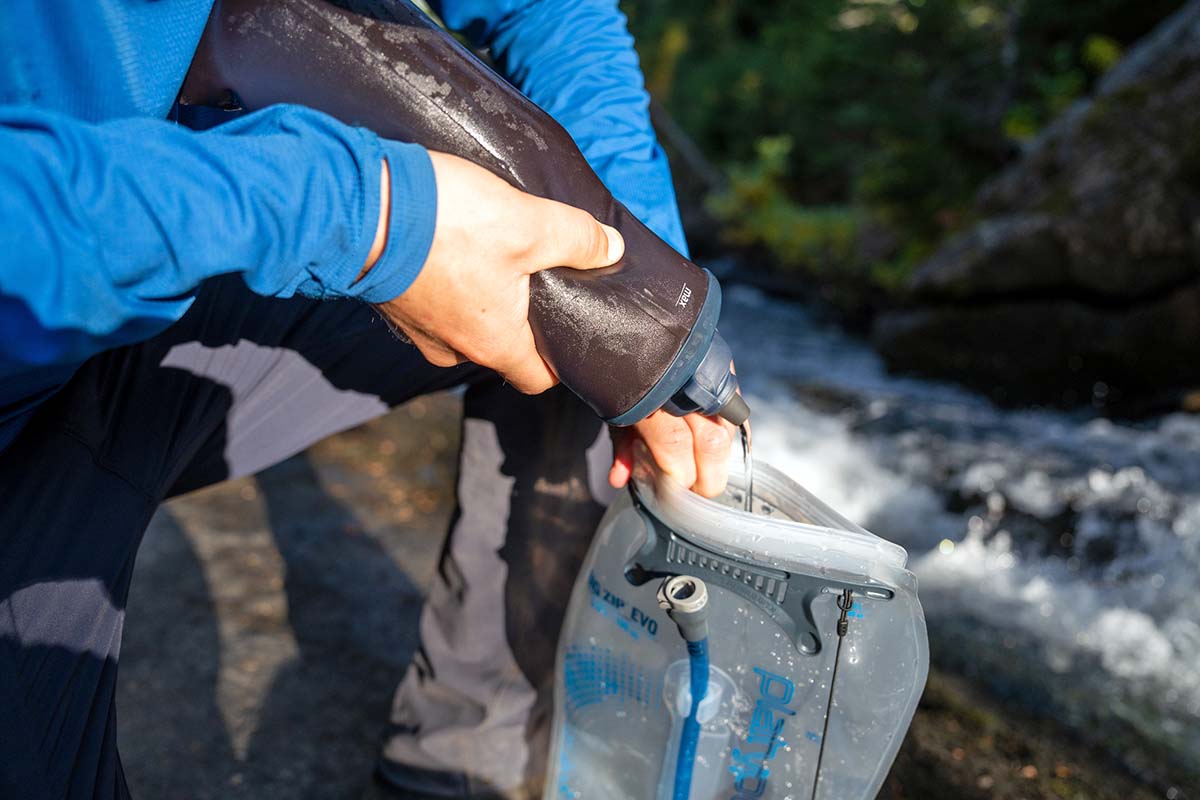
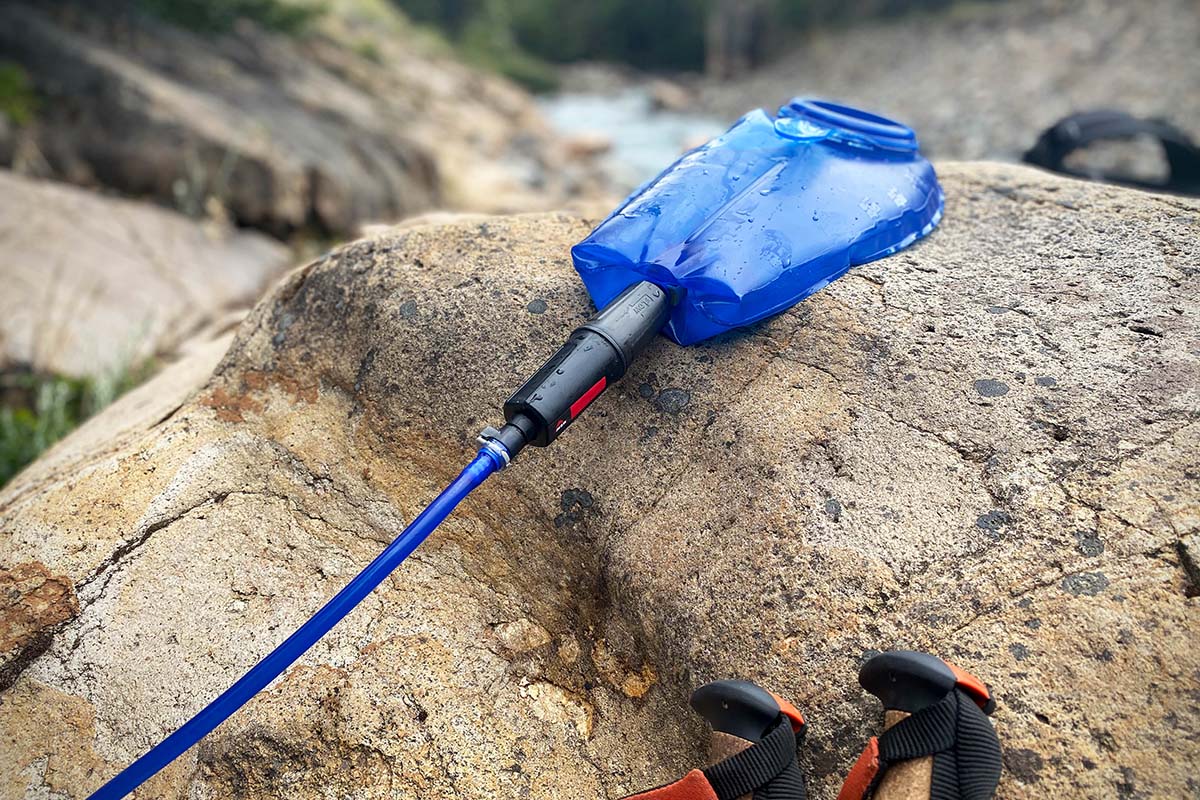
One of our favorite features on today’s hydration bladders is the quick-disconnect fitting, which allows you to detach the reservoir from the hose. This is extremely handy when it comes to refilling your bladder in the field: Rather than having to undo the hose from your backpack (where it’s inevitably routed through a port and a loop on the shoulder strap), you can leave it in place and remove just the bladder. The quick-disconnect fitting is also important if you plan to use an inline water filter (such as the CamelBak Reservoir Filter Kit)—the filter plugs into the port on your bladder, and the hose plugs into the filter, routing water from the bladder, through the filter, and into the hose.
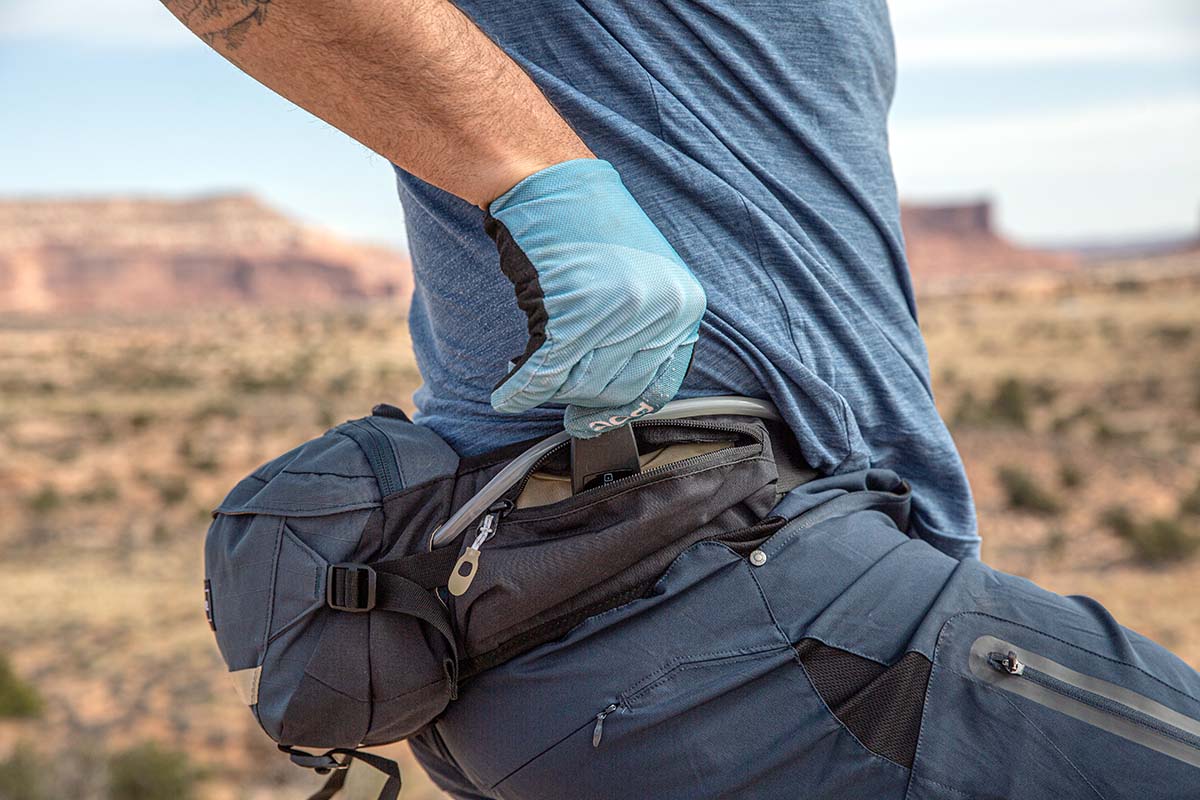
Quick-disconnect fittings are generally placed where the hose meets the bladder (near the base) or at the top of the bladder near the twist-cap or slider. We prefer the latter, as it allows you easy access rather than having to rifle around at the base of your pack. However, this can be a trickier (although not impossible) place to add an inline filter. It’s likely that you’ll adapt to whatever style you end up with, but if you’re consistently reaching for your empty bladder in a full backpacking pack or like the convenience of an inline filter, the placement of the quick disconnect is certainly worth considering. And if your hydration bladder doesn’t come with one, it’s often possible to add the customization with components like HydraPak’s Inline Connector or Osprey's Quick Connect Kit.
Structural Features
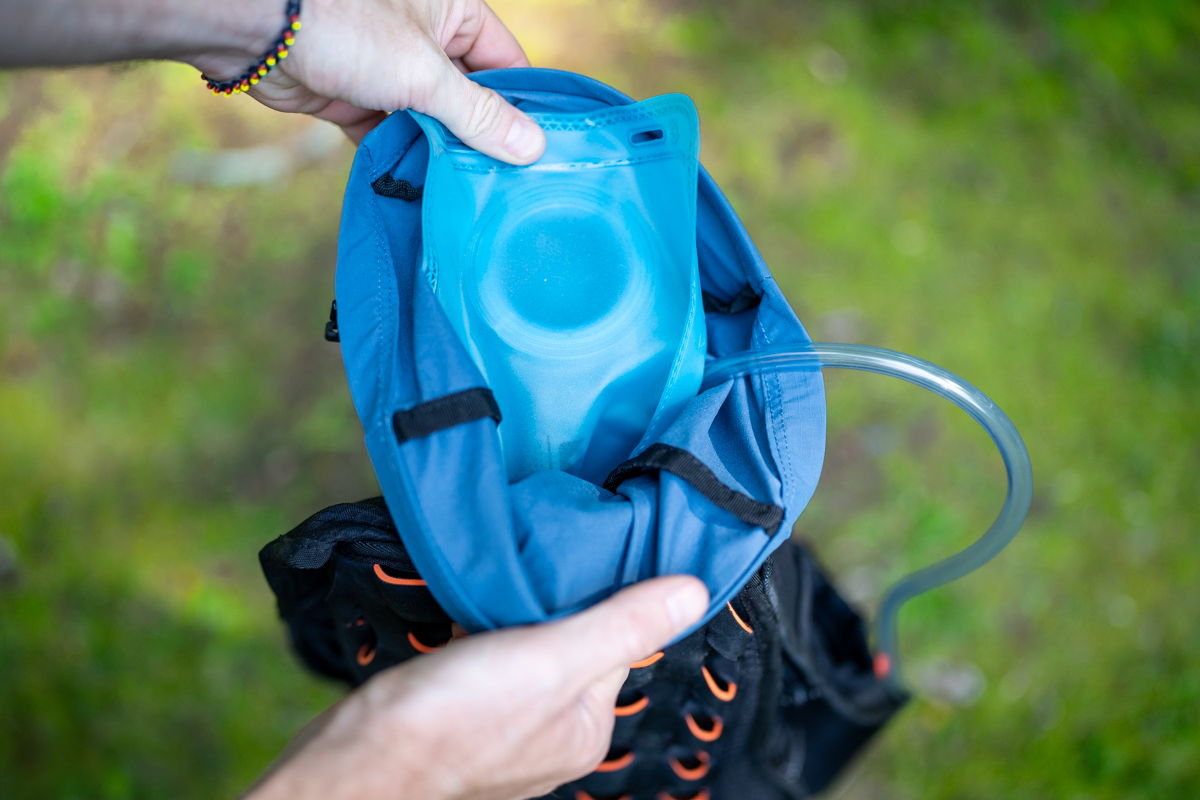
Many water bladders have added features that contribute to a more defined structure, which helps with loading into your pack and ensures the reservoir holds a streamlined shape no matter the contents. Some bladders (like our top-ranked Osprey Hydraulics) feature a rigid backer, which holds a very stable shape and contributes to durability, but adds weight and bulk and is difficult to invert for cleaning. More commonly, bladders use built-in baffles: This is by far the more streamlined design (most of these bladders are lightweight and easy to roll up), but the baffles do make cleaning a bit tricky, as you can’t turn the bladder inside-out and you’ll have to contend with the internal divider when cleaning. But baffles do go a long way toward keeping water from sloshing, making them a really nice feature to have.
Finally, some bladders—generally budget or ultralight designs—have nothing in the way of structure. These aren’t ideal for those carrying less-than-full packs, as the water weight will gather at the bottom of your load without the pressure of gear holding the bladder against the backpanel. For those carrying full packs, these bladders should pose less of an issue, although they might be a bit more difficult to slide in after refilling. And if you’re like us and lazily place your bladder at the very top of your backpacking pack, the lack of structure is a non-issue.
Hanger
Every hydration bladder here comes with some form of hanger on the non-port end. The hanger's primary use is to suspend the bladder inside a backpack (most backpacks feature a reservoir attachment on the inside of the backpanel), which keeps the bladder from slipping downward as it empties. In some cases, hangers can also be used to attach the bladder to a clothesline for drying, although this doesn't work as well when the hanger is integrated into the slider (which hangs free when open). We see a variety of hanger designs, from the minimalist cut-out on the Platypus Hoser and small webbing on the MSR DromLite to the CamelBak Fusion's "universal" hanger, which accommodates everything from loops to buckles and more. Chances are your hydration bladder is compatible with your backpack's attachment point, but it doesn't hurt to check.
If you’re planning on using a hydration bladder in sub-freezing temperatures or are particular about keeping your water cold in hot weather, you’ll want an insulated design. These bladders generally come in two different forms: Some feature built-in insulation by way of a double-wall construction with foam sandwiched between—the HydraPak Velocity IT is a great example—while other designs (such as the HydraPak HydraSleeve) use an insulated sleeve that slides on over the standard reservoir. Insulated bladders also tack on an insulated hose and bite valve cover, but keep in mind that these components have their limits: When using a bladder in particularly warm or cold weather, you’ll also want to get into the habit of clearing out the bite valve and hose after each use. Simply blow into the bite valve when you’re done drinking to send the water back to the insulated reservoir.
Mountain bikers often wear hip packs rather than backpacks for shorter rides. And while it may be possible to squeeze a standard hydration bladder sideways into a hip pack, the better solution is a purpose-built lumbar design such as the Osprey Hydraulics Lumbar. These bladders feature a shorter profile and less capacity (generally 1.5 to 2L), but are overall very similar to their backpack-ready counterparts. For example, the Hydraulics Lumbar ($42) opens and closes with a slider, uses baffles to mitigate water sloshing, and features a quick-disconnect and bite valve with on/off switch. If you’re in the market particularly for a bladder to fit in your hip pack, we recommend starting your search with lumbar designs.
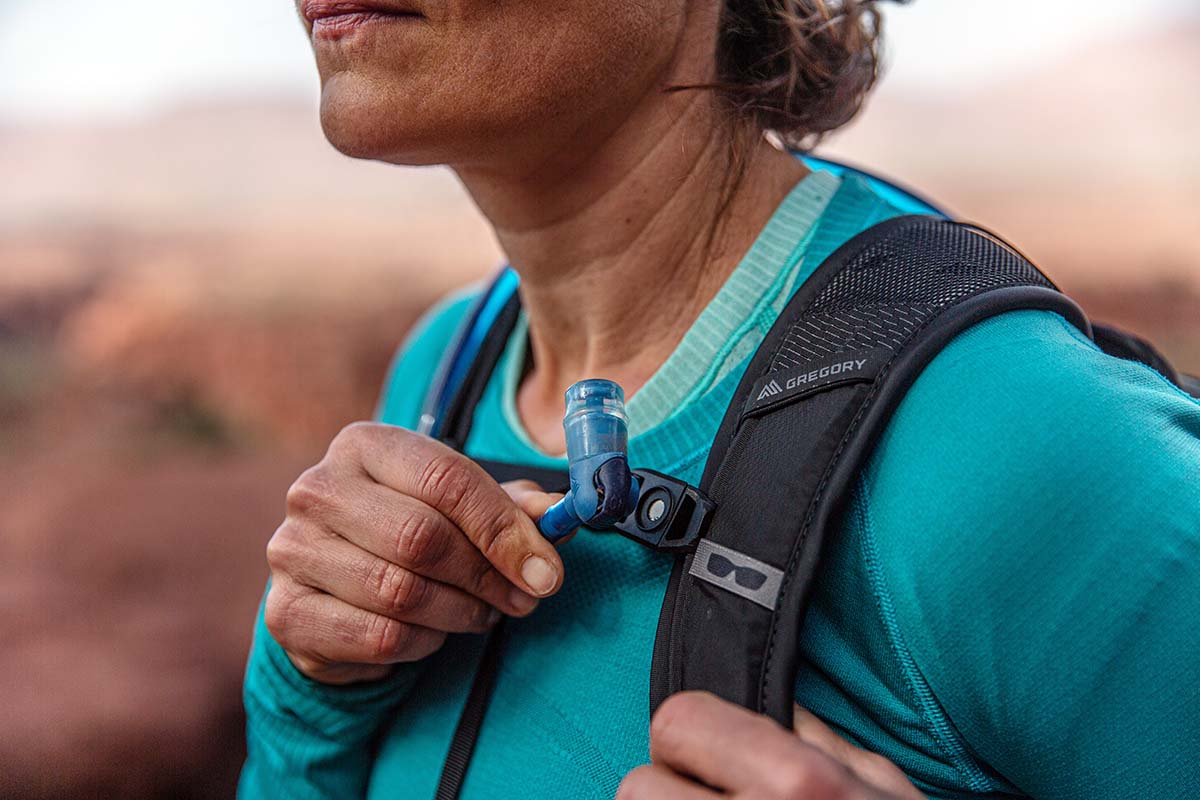
Companies like Osprey, HydraPak, Platypus, MSR, and CamelBak offer a number of add-ons to help customize your hydration bladder or keep an older setup running after years of service. One of our favorites is the magnetic sternum strap attachment, which includes two parts: one for the tube, and one for your backpack’s sternum strap (Osprey’s Hydraulics Hose Magnet Kit is a great option). You can also add an insulated tube, a quick-disconnect fitting, a bite valve cover, and more. Additionally, major brands like CamelBak, Osprey, HydraPak, and Platypus offer replacement bite valves should they break down over time. The main takeaway here is that if the hydration bladder you’ve chosen doesn’t contain all the features you’re looking for—or you have needs that pop up after extended use—you might be able to customize it after purchase.
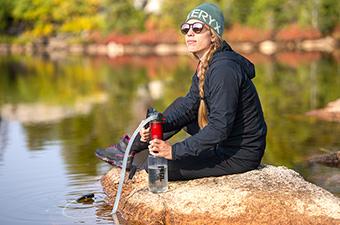
There are many ways to treat your water in the backcountry, including pump filters like the Katadyn Hiker, bottle/squeeze filters like the Platypus QuickDraw, and chemical applications like Aquamira or Katadyn’s Micropur tablets. Another option is to add an inline filter to your hydration bladder, which greatly simplifies the water treatment process. Simply fill up your reservoir with “dirty” water, attach the inline filter at the bladder’s quick-disconnect fitting, and plug your drink tube into the other end. Our favorite inline designs are the MSR Thru-Link and CamelBak’s Reservoir Filter Kit, and it’s also worth checking out HydraPak’s 28mm Filter Kit.
All of the hydration bladders above are sold as standalone products, but it’s also very common to see hydration bladders included in hydration packs and running vests. These designs are made to integrate seamlessly: Oftentimes, hydration packs will have a reservoir sleeve perfectly sized for the included reservoir, and offer features like hangers, tube ports, routing tabs, and magnetic sternum strap attachments. Running packs, like the Nathan Pinnacle Pro 12L, tend to include running-specific bladders, which are generally 1.5 liters in capacity and feature streamlined components, hourglass shapes, or insulated designs. If you’re buying a hydration bladder with the intent to pair it with a day pack or running vest, it’s a good idea to first take a look at these all-in-one designs. And for a deeper dive, be sure to check out our articles on the best hydration packs and the best running hydration packs and vests.
Back to Our Top Hydration Bladder Picks Back to Our Hydration Bladder Comparison Table