
Photo Credit
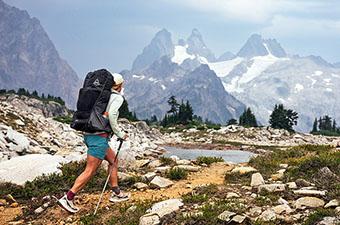
One of the first steps to enjoying a backpacking trip is learning how to load your pack properly. There are a lot of considerations that go into a well-packed backpack, from nailing the capacity and balancing your pack's contents to keeping critical items handy on the go. Below we cover everything you need to know, including packing order, weight distribution, organization and access, where to stow a bear canister, and more. For all of our top picks, see our articles on the best backpacking packs, best women's backpacking packs, and best ultralight backpacks. And to make sure you’ve got everything you need before heading into the backcountry, check out our comprehensive backpacking checklist.
Editor's note: We updated this guide on July 17, 2025, to add many photos from recent testing trips, include some more tips and tricks, and ensure all information was current at the time of publishing.
If you’re in search of a simple how-to guide to packing your pack, this is a good place to start. Below, we break your pack down into five sections—the bottom, middle, and top of the main compartment, external pockets, and external lash points—and explain what gear goes where.
Use this section for bulky camp items that you won’t need access to during the day:
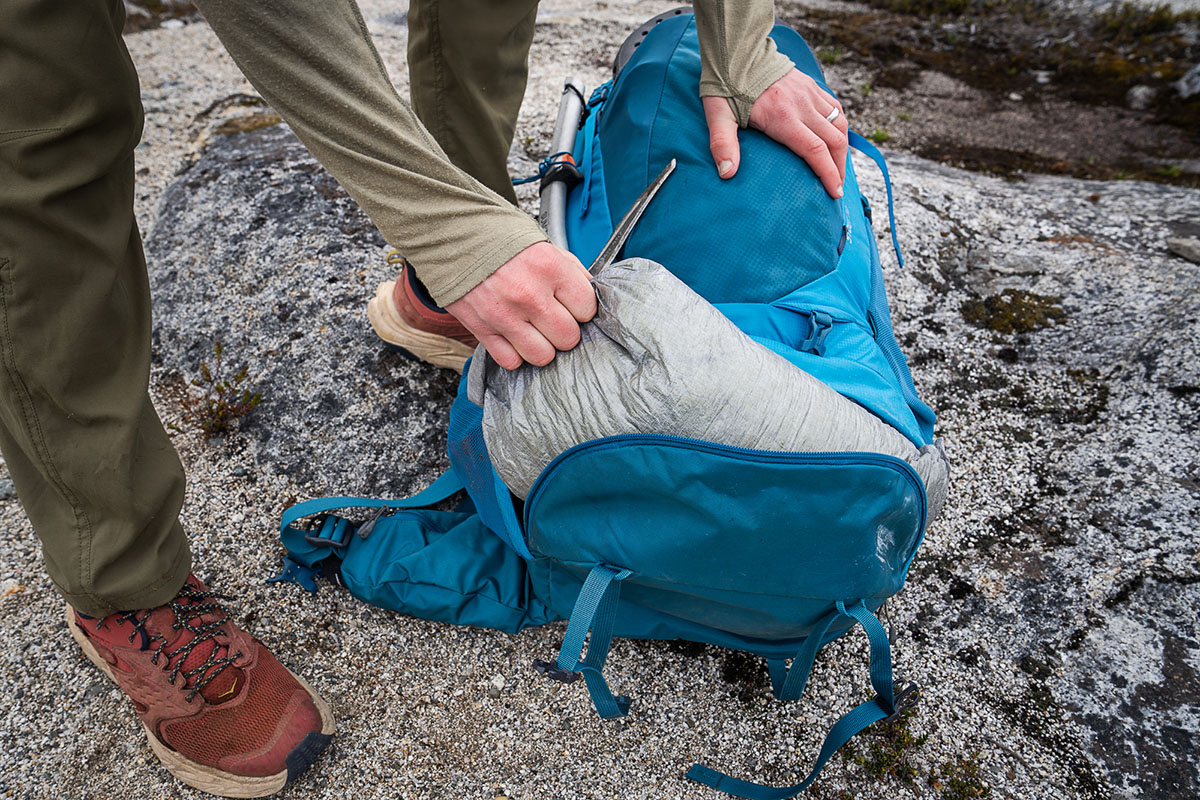
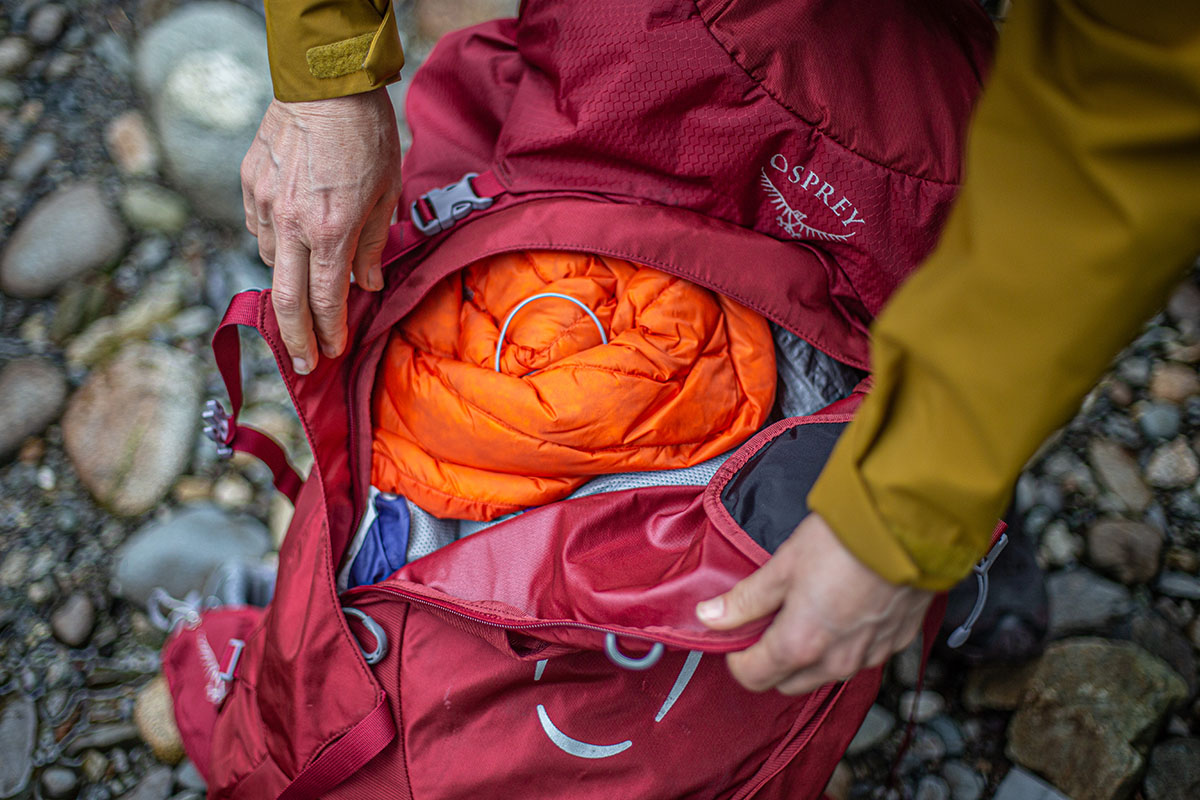
Because this section of the pack will hang below your core, you won’t want to load it down with your heaviest items. Putting the sleeping bag at the bottom of a pack is so commonplace that some backpacking packs—including our top-rated Osprey Atmos AG and women’s Aura AG—even have separate compartments here with external zipper access. However, for the tightest pack job (more in our section on “Fill the Gaps” below), we prefer to unzip the internal dividing wall and combine the bottom with the main compartment. Additionally, this creates something of a pillow on your lumbar, on top of which the heavier items can sit. You probably won’t be needing your sleeping bag until the end of the day when you are setting up camp, so there is no issue with shoving it to the bottom. Along the same lines, it’s helpful to put the other elements of your sleep system, such as a sleeping bag liner and sleeping pad, in the bottom of the pack. These items are also relatively lightweight and won’t be needed throughout the day.
The middle of the main compartment is where we suggest storing the heaviest items that you won’t need access to during the day:
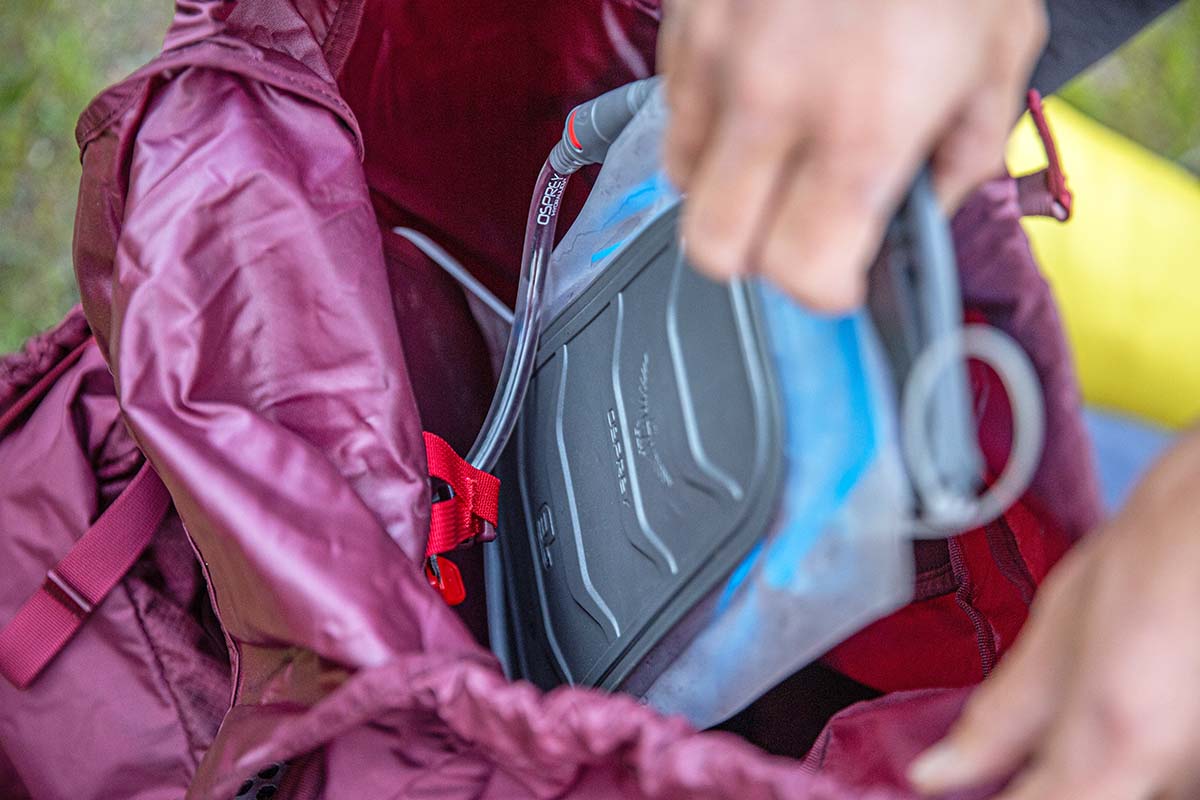
In addition to being heavier, the gear above is more rigid than soft items at the bottom, so it's best to play Tetris here until most of the gaps are filled and the items fit nicely together. We like to put the tent towards the top of the middle, which makes it easier to retrieve in the case of a surprise rainstorm. And before you start to pack this section, be sure to load your water reservoir into its sleeve—it’s no fun trying to stuff 2 liters of water down the back of a fully loaded pack. You want to pack this gear (such as your food bag, cooking system, and backpacking tent) as close to your back (and center of gravity) as possible. By putting these items in the middle of your back, you alleviate a good deal of stress from your shoulders and lower back. You can also use spare clothes that you don't need throughout the day to fill in the gaps between these items. This will keep them from shifting around while you are hiking, and help prevent irregular items from poking you uncomfortably as you trek.
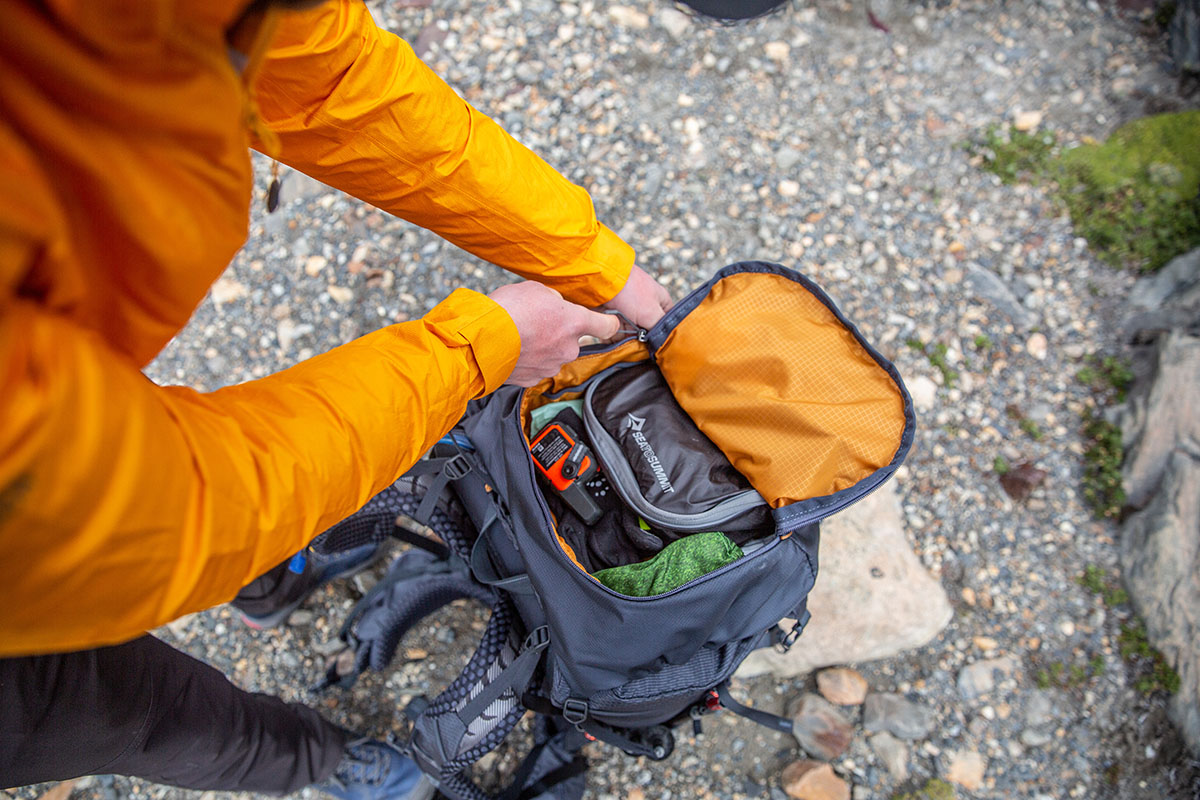
This section is best suited for bulky items you might need to access during the day while you're on the trail. When packing towards the top of your pack, you want to think of what you’ll need throughout the day in chronological order, how the weight is distributed, and if you can quickly protect all of your gear from sudden rainstorms. If you use a rain cover as your primary protection, every pocket will be protected. But, if you rely on a pack liner, you need to make sure that the items in external storage are in additional waterproof containers or dry bags.
The external pockets are perfect for small items you might need to access throughout the day:
Modern backpacking packs have all sorts of external pockets, ranging from the top lid to side and front stash pockets, front zippered pockets, hipbelt pockets, shoulder strap pockets, and more. Some stash pockets are even made with built-in drains or from durable mesh, making them great places to store wet gear. Avoid storing heavy items in your external pockets—especially those on the front of your pack body—as they can negatively impact weight distribution and throw you off-balance.
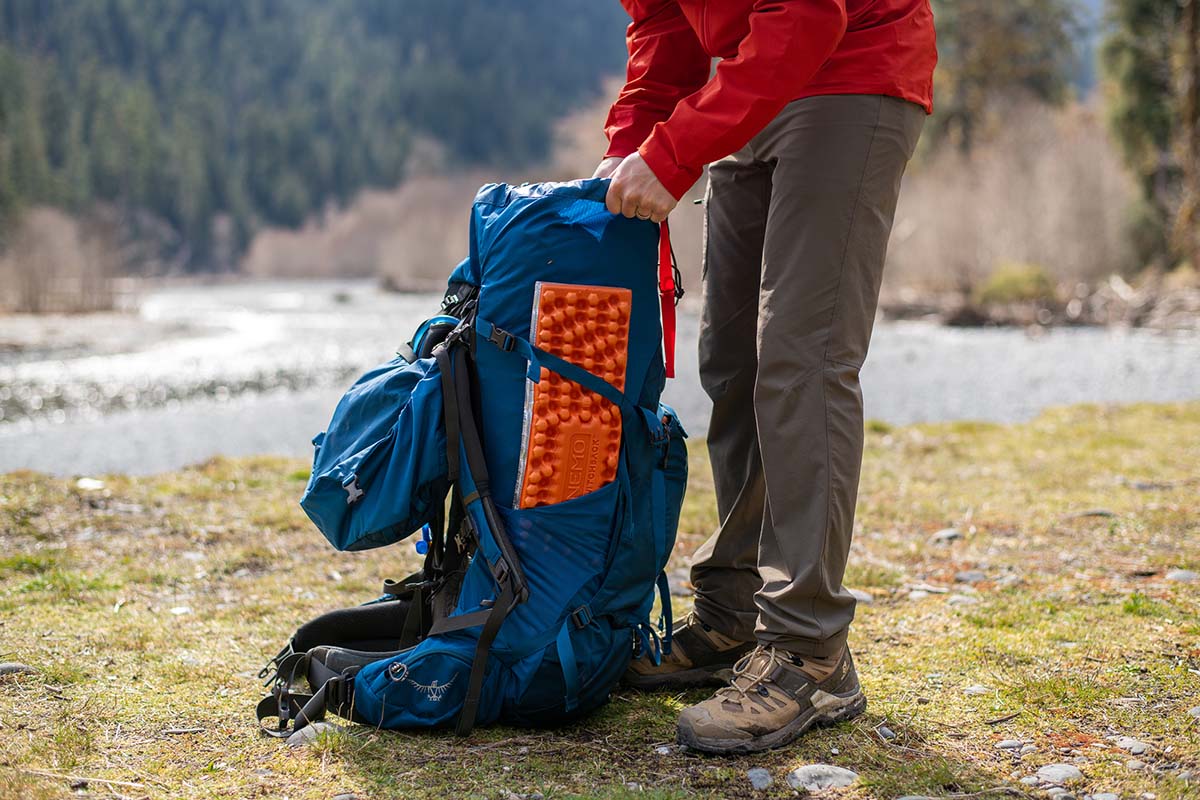
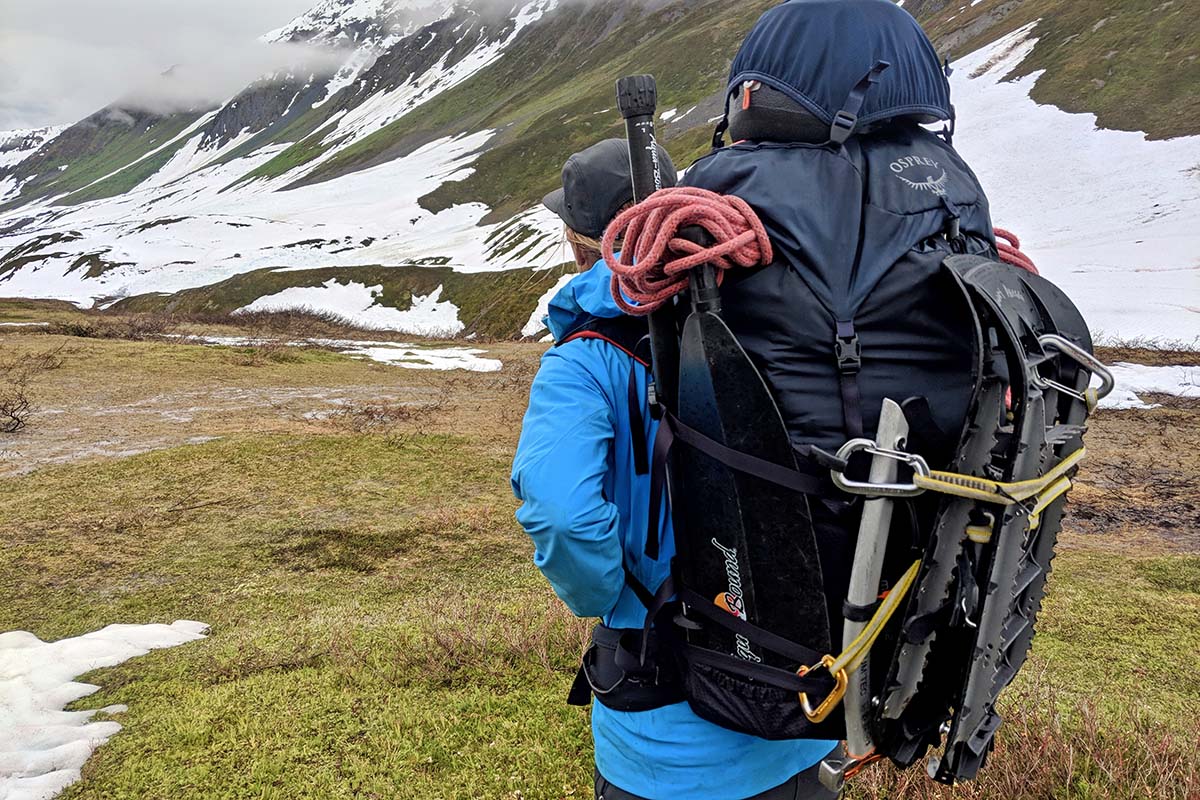
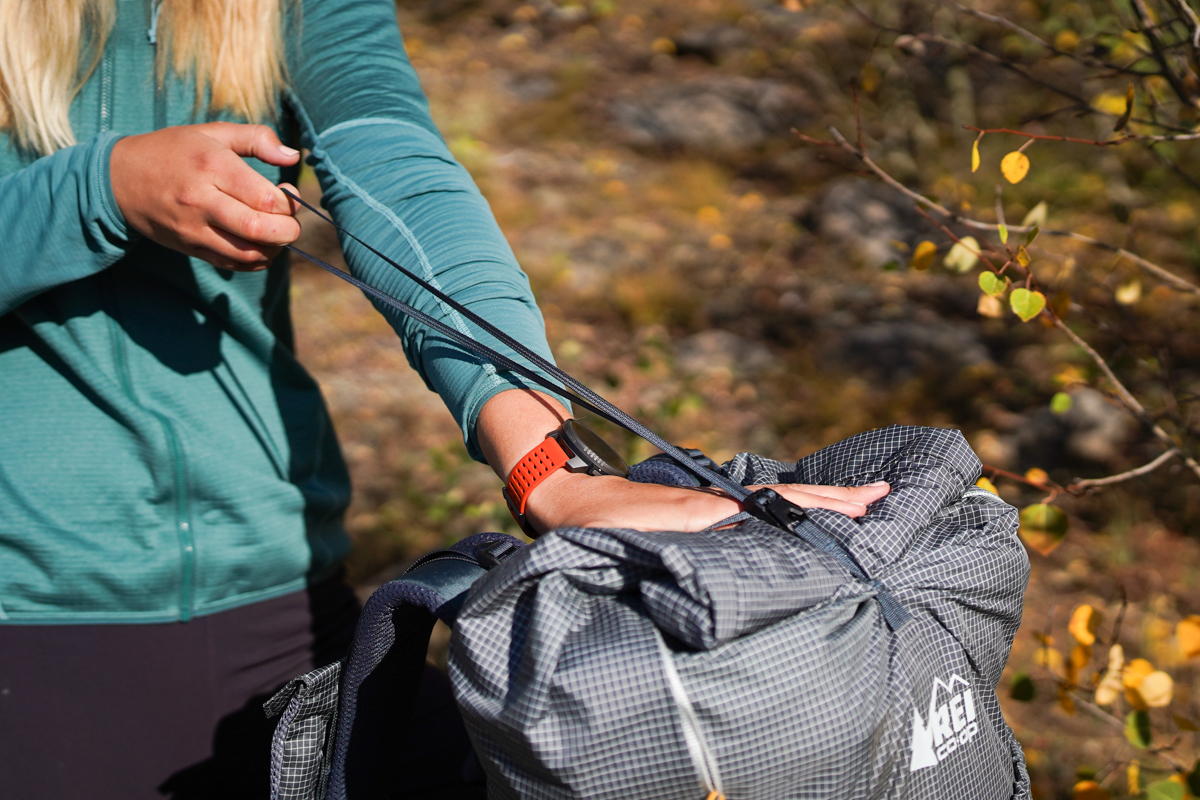
This is where you should keep lightweight but bulky gear you want to keep handy or that's simply too large or pointy to fit inside your pack:
Most backpacks feature a range of external lash points, including daisy chains, trekking pole holders, ice axe loops, compression straps, and more. That said, you’ll want to limit how much gear you store externally. Why? First and foremost, needing to pack gear on the outside of your pack is a telltale sign that you’ve exceeded the load limit and need to pare down your kit. Second, weight that's not focused close to your body’s core (read: all weight on the outside of your pack) can create an imbalanced load. And finally, items stored on the outside of your pack are at greater risk of getting lost or damaged.
The packing order listed above is largely governed by one key principle: A balanced load is—or at least feels like—a lighter load. For this reason, it’s best to place your heaviest gear in the middle of your pack, close to your body and between your shoulders and waist. Likewise, avoid placing heavy gear towards the outside of the main compartment (away from the back) or externally, as the weight can make you top- or rear-heavy and pull you backwards. You’ll also want to be sure to balance the side-to-side weight of the pack, as this can heavily impact comfort on the trail.
In most instances, your heaviest items will be your food and water. If you’re carrying a rope for climbing or glacier travel, it’s best to put this in the middle of the pack and close to your body, as well. Further, each person’s center of gravity is different—those with broad shoulders, for example, will likely have a higher center of gravity than those with wider hips. All in all, you’ll want to tweak your load so that your weight is well balanced at your center of gravity (for this reason, women often put heavier items lower in their pack).

Along with a well-balanced load, it’s important that your gear is organized in a way that allows you to access certain items easily. Think of what you might need during a day on the trail: snacks, sunscreen and sunglasses, bug spray, rain jacket or puffy, water filter or purifier, a first aid kit, etc. You'll want to identify these items before you pack and place them at the top of your pack or in one of the external pockets. We even like to pack our tent towards the top of the middle section of our pack in case weather moves in during the day. Finally, be sure to keep weight distribution in mind as you organize your gear. For example, it’s better to store your heavy camp shoes or 1-liter Nalgene in the lower side pockets of your pack than affixed to the back.

When packing a backpack, we like to think of the contents as either rocks or sand. The rocks are the items that have firm shapes: a cook kit, bear canister, or tightly packed backpacking tent, for example. The sand represents more malleable items, like an unpacked sleeping bag or tent, down puffy, or rain layers. We put in the "rock" items first for each section and then surround them with "sand." For example, we often put our sleeping bag and pad (both in stuff sacks) at the bottom of our pack and then fill in the small gaps with our camp puffy. Then we’ll add our bear canister, cook kit, and fuel, and stuff our rainfly along the sides and top to fill in all the holes.
Although this technique requires you to pack some gear in untraditional ways, it’s the most effective method we’ve found to create a truly tightly packed pack. However, keep in mind that you’ll want to be gentle when stuffing these items, and some ultralight gear will be too fragile for the job. And if you’re someone who prefers to keep your gear in stuff sacks, you can still use this method by layering firm items with softer gear like a loosely packed sleeping bag.
Usually found along the sides of a pack, compression straps function to snug up any dead spaces inside your pack and bring the weight as close to your back as possible. To use them, loosen the straps before loading your pack, then tighten them once all your gear is inside. If you have a small load with respect to your pack’s capacity (like a half-full 60L pack), it’s often a good idea to put all the contents inside, lay the pack on its backpanel to ensure the gear is distributed throughout, and then tighten up the compression straps on each side. This will keep your gear evenly balanced and close to your back, as opposed to a short and stout load that focuses all of its weight low on your body.
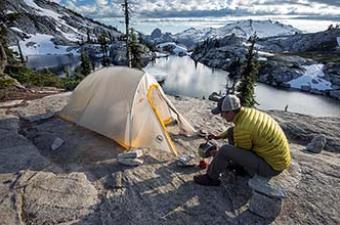
We’d be remiss not to touch on bear canisters here, as they're mandatory in a number of popular wilderness areas throughout the U.S. The most prominent backpacking zone that requires bear canisters is along the John Muir Trail in the Sierra Nevada Mountains of California. Backpackers visiting this area (and Pacific Crest Trail thru-hikers passing through the Sierras), must carry all of their food and smellables in a bear can for over 200 miles. It shouldn’t come as much of a surprise that bear canisters aren’t easy to stow and can take up a large portion of your pack. We’ll often see hikers packing their bear canister between their pack body and lid, but if we’ve learned anything here, it's that food is heavy, and heavy gear should go next to your back. So, what’s the best way to pack a bear canister?
Packing a bear canister horizontally is the most efficient use of space and minimizes areas that might dig into your back (especially if you have a thin backpanel). We recommend putting the canister on the bottom of the middle layer or on top of your sleeping bag and extra clothing. This way, it will fit nicely into your lumbar region and keep your center of gravity low and balanced. And when your food supply starts to dwindle, you can stuff other items into your bear canister to decrease your pack size and keep weight evenly distributed. If you have to stow your canister vertically (some packs aren’t big enough to accommodate them horizontally), treat it like a “rock” in the center-middle of your pack and stuff a lot of “sand” around it.
While some backpacking zones require you to carry bear canisters, others allow food to be stored in Ursacks. This sturdy alternative to a bear canister looks and feels like a heavy canvas sack, but is made of Spectra, a super high-strength polyethylene, and has passed the Interagency Grizzly Bear Committee (IGBC) test. They have been on their bear-resistant products list since July 31, 2014. When tied and stored correctly, an Ursack makes it nearly impossible for bears or other animals to get to your food—though they can definitely obliterate the contents from the outside in their efforts. As such, it won't preserve your food as nicely as a bear canister. It's important to note that Ursacks are not legal alternatives to bear canisters in some zones, such as the Sierras along the PCT.
Be sure to check with local authorities before entering any area with a concentration of bears, and ensure that an Ursack is a viable method of keeping your food and smellables safe. Our author used a 10L Ursack on his thru-hike of the CDT in Wyoming and Montana with great results. They are much more packable and way lighter than bear canisters, making them attractive to ultralight backpackers venturing into grizzly territory.
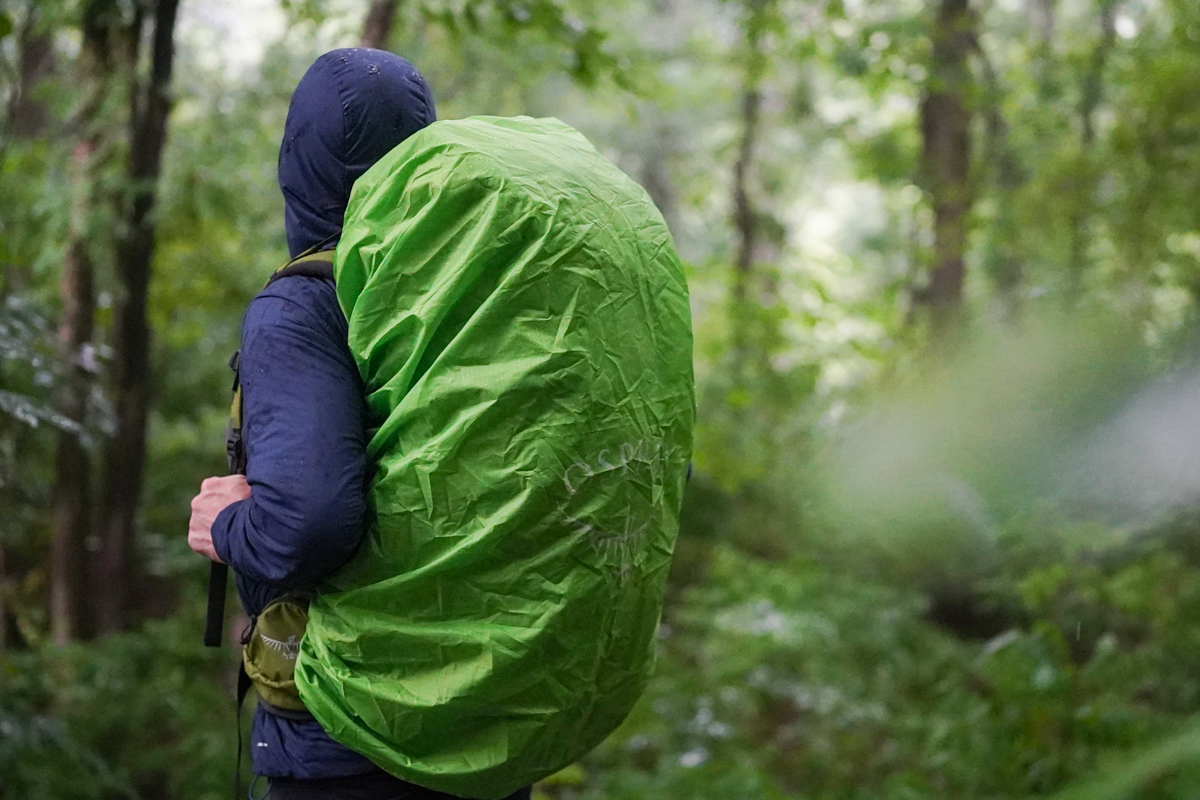
Most backpacking packs aren't entirely waterproof, although many are coated with a durable water repellent (DWR) finish that resists moisture and keeps it from soaking into the fabric for a period of time. Others are made with inherently waterproof materials like Ultra or Dyneema, although these are typically specialized (read: pricey) ultralight designs. However, if you plan to hike in rainy or especially dewy environments, we recommend waterproofing your gear in one of two ways. Our favorite method—tried and tested throughout multiple seasons of guiding along British Columbia’s wet coastline—is lining the inside of our pack with a large trash compactor bag or bag liner. These are strong enough to resist punctures, fully waterproof, and very inexpensive.
Two of the most popular waterproof pack liners are Nylofume bags, such as this one sold by Garage Grown Gear, and polyethylene bags, such as this one from Gossamer Gear. Both are fantastic alternatives to trash bags or rain covers and can also serve as odor barriers when tied off securely at the top. For reference, one Nylofume liner kept one of our tester's gear safe and dry for an entire three-month thru-hike of the Appalachian Trail. These things are relatively cheap, way stronger than they appear at first glance, and add negligible weight to your pack. Another option is to use a standard pack cover like REI's Duck's Back Rain Cover, which wraps around the outside of your pack rather than lining the interior.
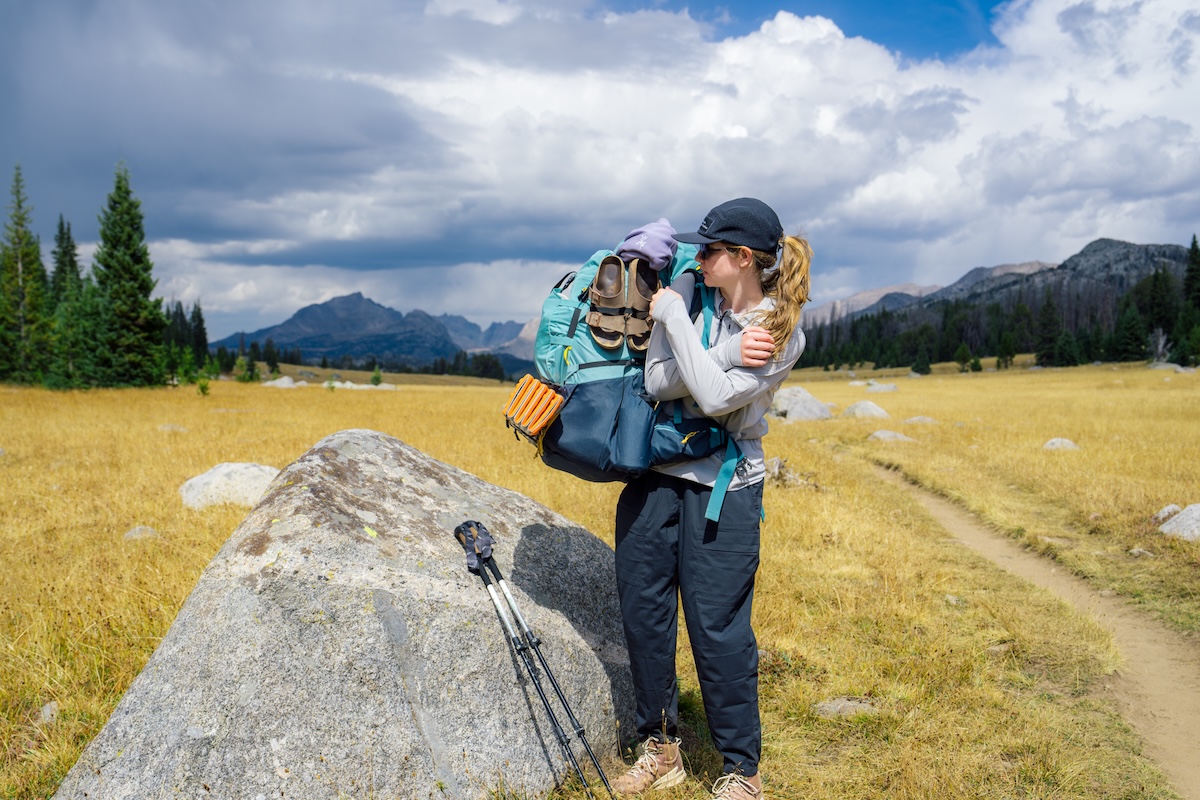
If you have an especially heavy pack, there are a few steps to help minimize effort and prevent injury when you swing it onto your back. First, place the pack upright on the ground and grab the pack by the top haul loop. With your legs positioned a little wider than your shoulders, back straight, and knees slightly bent, slide the pack up onto your leg and rest it on your thigh. Next, slip your arm on the same side through the shoulder strap (with the other still on the haul loop for stability), lean forward to shift the pack onto your back, then put your other arm through the opposite shoulder strap. You can also use a tailgate or rocks to elevate the pack before donning it or have a hiking buddy help lift it up onto your back.
At this point, it’s time to buckle and adjust all the straps, starting with the hipbelt, followed by the shoulder straps, then the sternum strap, and finally the load lifters. Around 80% of the pack's weight should be resting on your hips, while the shoulder straps and load lifters are designed more to keep the weight close to your back than actually provide support. It might take a few tries with loosening and tightening to dial in the right fit, but we can tell you firsthand that it’s worth taking the extra time to get it right before you start your hike. For a more detailed breakdown on making the proper adjustments, see our Backpack Fit and Sizing Guide.
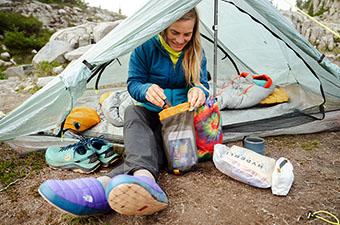
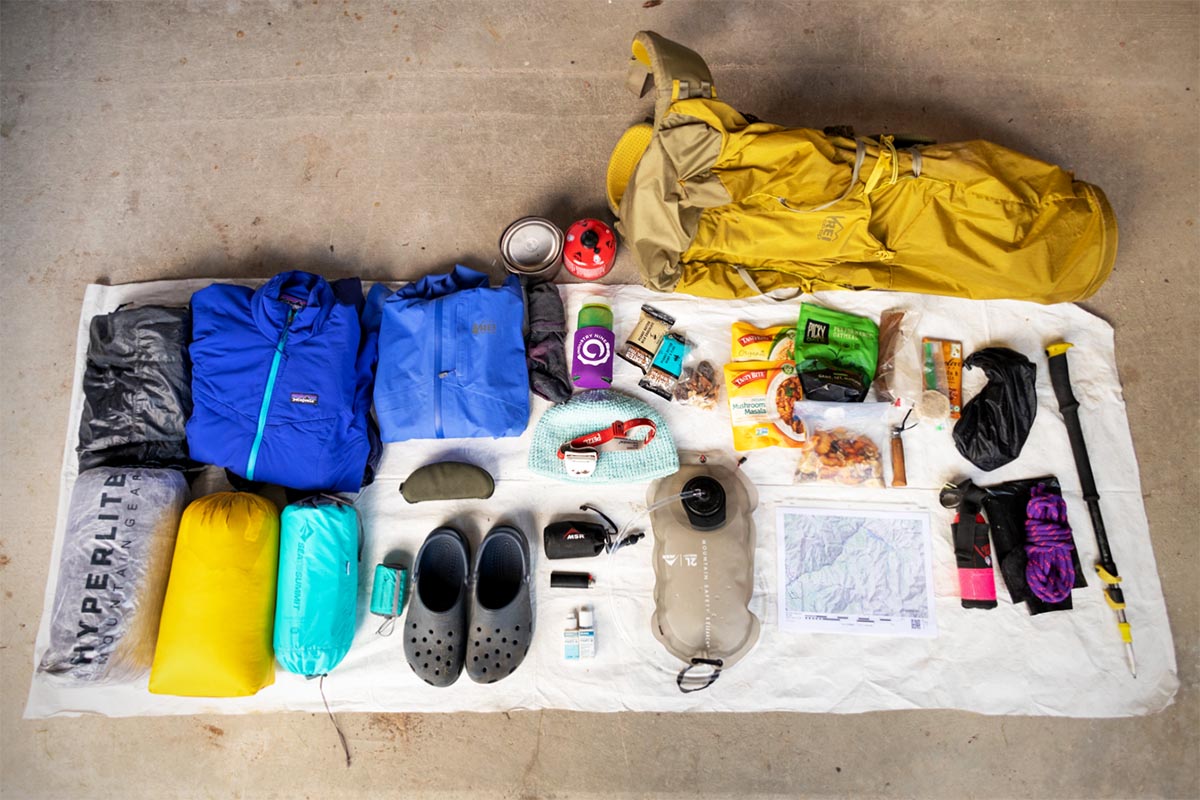
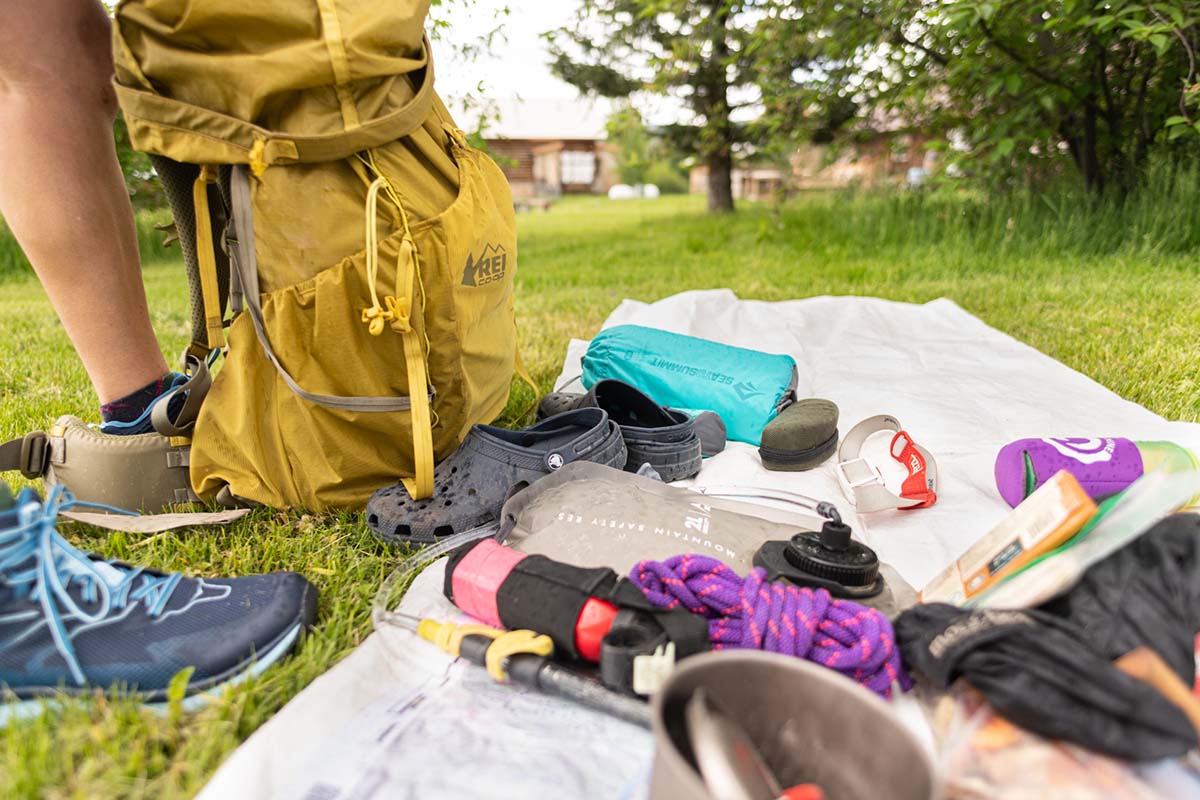
It’s easy to overpack for a backpacking trip, regardless of trip duration. The best way to avoid running out of space is to lay out all of your gear on the ground before you start packing, separating it into categories: kitchen items, food, sleep system, toiletries, clothing, etc. We love using ZipLoc bags to organize daily food—one bag includes all our meals, snacks, and beverages for one day—and labeling them accordingly. For truly maximizing space, compression sacks can make a big difference in condensing some of your bulkier items like a sleeping bag or clothing (we love Sea to Summit’s Ultra-Sil, which can reduce volume and keep your gear dry in the process). Once you’ve got it all laid out, it will be easier to eliminate any unnecessary items.
We could talk forever about how to pack your backpack, but if you don’t have enough capacity, you won’t get very far from the trailhead. Putting 50 liters’ worth of gear in a 40-liter pack is a recipe for disaster—not only are you bound to have poor weight distribution, but you’re also likely to max out the pack’s load range (a guarantee for discomfort). That said, you also don’t want too big of a pack, as it will focus all the weight towards the bottom and carry your load inefficiently. Plus, carrying a large-capacity pack (when you don't necessarily need it) can make it tempting to bring more gear and end up overloaded on the trail.
Gear will vary from one person to the next. Minimalists and ultralight backpackers often settle for a barebones gear list and dedicated UL items, while more comfort-focused hikers typically opt for slightly bulkier gear and a few luxuries. Further, some backpackers will need to carry more than their share of the group load. That said, below are our recommended pack capacities based on the length of your trip.
If you're still looking for that perfect backpacking pack for this season, below are our top selections across three categories: traditional designs, women's-specific models, and streamlined packs for minimalists like ounce-counters and thru-hikers. For a more comprehensive look at the market, plus detailed buying advice to help you choose the right option for your adventures, see our full articles on the best backpacking packs, best women's backpacking packs, and best ultralight backpacking packs.
Best overall: Osprey Atmos AG 65
Best budget: REI Co-op Trailmade 60
Our favorite for hauling heavy loads: Gregory Baltoro 75
Best balance of comfort and weight: Osprey Exos 58
Best overall: Osprey Aura AG LT 65
Best budget: REI Co-op Flash 55
Best for hauling heavy loads: Gregory Deva 70
Best balance of comfort and weight: Osprey Eja 58
Best plus-size: Gregory Jade 63 Plus Size
Best overall: Hyperlite Mountain Gear Southwest 55
Best budget: REI Co-op Flash 55
Best for customizing fit: ULA Equipment Circuit
Best frameless: Mountain Laurel Designs Exodus 55L
Best for fastpacking: Ultimate Direction Fastpack 40
Back to How to Pack a Backpack See Our Top Backpacking Packs