
Photo Credit
Switchback Travel
Switchback Travel
Adventure in the Grand Canyon is most often associated with rafting the Colorado River. But while there’s much to be seen from the canyon floor, the vast and undulating walls of The Big Ditch hold even more potential for exploration. Grand Canyon hikers have many options for multi-day treks, but the 35-mile Escalante Route is the full package. Perhaps no other route provides such an impressive survey of the area's geology: you’ll wander along sweeping ridgelines and down tight canyons, ascend steep cliff bands, and follow the flow of the mighty Colorado while catching a rare glimpse of the Canyon’s lesser-traveled folds. Route-finding can be difficult on this unmaintained trail, so below we provide a helpful day-to-day breakdown, in addition to details on difficulty, gear, water, the Papago Wall and Slide, permits, and more.
Take note: the Escalante Route refers to the section of trail along the Colorado River between Tanner Rapids and Hance Rapids, but (short of rafting the Colorado River) hiking is the only way to reach each of these points. The most common route (and the one we took) is to hike in on the Tanner Trail via Lipan Point (to Tanner Rapids) and out via the Tonto and Grandview trails (from Hance Rapids). You can also extend the length of your trip with variations along the descent and ascent.
Length: 9 miles
Elevation: 4650’ loss
Difficulty: Difficult
Campsite amenities: Open-air pit toilet, ~6 tent sites, water collected from Colorado River
After planting a car at Grandview Point, drive (or taxi) to Lipan Point, along the South Rim’s Desert View Drive. The trail descends quickly from the parking lot, losing over 1,200 feet of elevation within the first mile. If you start in the morning, you’ll have shade along this section of the trail but will quickly pass into an exposed, unforgiving landscape for the rest of the day. Be sure to bring ample water for the descent (I used 3 liters, and you'll want more on particularly hot days), as there is no water source until you reach Tanner Rapids on the Colorado River. The 9-mile trail from rim to river is relatively easy to follow. Once you reach the sandy canyon floor, head briefly down river to reach the Tanner Rapids camp (you’ll pass the pit toilet just before reaching the tent sites)..jpg)
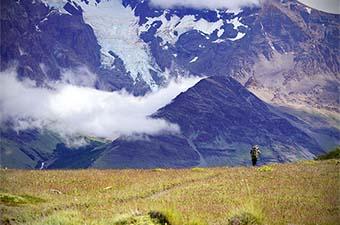
The Tanner Trail is particularly beautiful for two main reasons. First, it stays mostly atop ridgelines, offering jaw-dropping views throughout the day. As you meander along the Furnace Flats plateau, there are towering walls in the background and rare glimpses of the Colorado River below—barely the downward slog many might associate with a rim-to-river Grand Canyon trail. Second, the Tanner Trail travels through an incredibly diverse and colorful array of landscapes, which take you on a journey through geologic time. Throughout the day, you’ll see vibrantly orange Coconino sandstone, dappled-red Redwall Limestone, and green and purple limestone along the trail, all while enjoying the sweeping mural of the Palisades of the Desert as your backdrop..jpg)
Length: 8.6 miles
Elevation: 1200’ gain, 1200’ loss
Difficulty: Moderate
Campsite amenities: ~6 tent sites, water collected from Colorado River
Leaving Tanner Rapids, hike downstream along a rock-lined path that heads slowly away from the beach and onto a bench above the Colorado River. The trail parallels the river for about 3 miles, meandering up and down and through a few gullies before arriving just above Cardenas Beach (a potential campsite if you want to lengthen the first day or shorten the second). Consider dropping down about 200 yards to the river and resupplying water here, as the trail is dry and exposed for the next 6 miles to Escalante Creek..jpg)
The ascent out of Cardenas Beach is where the bulk of the day’s elevation gain occurs. The trail quickly climbs up and away from the river, offering incredible exposure, views, and a few flat areas perfect for snack breaks. You’ll follow the contours of the canyon walls, meandering around drainages and above cliffs that drop steeply to the river. Eventually, the trail begins its descent at the apex of a ridgeline, dropping down into a canyon and eventually into the Escalante Creek bed (we found running creek water here—a nice respite from the silty Colorado). Follow the mostly dry Escalante Creek to where it intersects with the Colorado River, where a few sandy campsites await. Alternatively, continue an additional few miles to camp at Seventyfive Mile Creek, but this section of the trail is technical and difficult to navigate, so don’t attempt it with limited daylight. .jpg)
Length: 11.5 miles
Elevation: 1750’ gain, 500’ loss
Difficulty: Difficult
Campsite amenities: ~10 tent sites, water collected from creek
Day three’s route briefly follows the Colorado before ascending away from the river and along the rim of the dramatic Seventyfive Mile Canyon. About a mile after leaving camp, you’ll reach the entrance to the canyon via a tricky section of steep, slippery rock (a blockaded trail continues on the other side of the canyon rim, but we chose to follow cairns and drop in here). Hiking down this narrow and deepening canyon was well worth the effort and proved to be one of the highlights of our trek. .jpg)
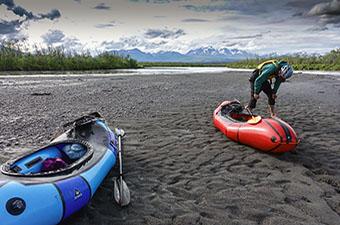
Once at the canyon mouth, the trail follows the river for a few miles before arriving at the Papago Wall and, subsequently, the Slide (for more information, see “Papago Wall and Slide” below). Soon after these obstacles, you’ll encounter a beach just above Hance Rapids—a great place to enjoy a snack and watch rafters tackle one of the Colorado's most challenging sections of whitewater. This beach also marks the end of the true Escalante Route. From here, you have the option of ascending into the canyon via the New Hance Trail or continuing downriver along the Tonto Trail (we opted for the latter). .jpg)
Over the course of 6.5 miles, the Tonto Trail gradually ascends about 1,400 feet to reach the primitive camping along Hance Creek. The trail is relatively easy to follow throughout this section, but there is no water, so be sure to load up before you leave the shores of the Colorado. Once at Hance Creek, the trail drops down into a drainage and leads to a variety of campsites on small bluffs above the perennial water source.
Length: 5 miles
Elevation: 3700’ gain
Difficulty: Difficult
Follow the Tonto Trail for about a half-mile as it ascends a steep hill above and along Hance Creek before reaching the junction of the Tonto and Grandview trails. Head left on the Grandview Trail and continue ascending the steep canyon walls (to extend your hike, head right and do a loop around Horseshoe Mesa—or follow the Tonto Trail over 20 miles until its intersection with the South Kaibab Trail). Here, the Grandview Trail is littered with turquoise-colored rocks (copper ore) and passes multiple defunct mines and pieces of rusted mining equipment, offering a fantastic opportunity to explore the history of the Grand Canyon. As you continue up the trail, just picture late-19th-century miners leading ore-laden mules up the exposed steps. .jpg)
The Grandview Trail eventually reaches a wide ridgeline, where you’ll catch your first views of the canyon’s rim. Continue up on an easy-to-follow, well-trafficked trail until finally ending at the Grandview Point parking lot. Before you head back to reality, take mental stock of all the various landscapes you’ve seen throughout the past four days. The Grand Canyon is truly a vast and diverse landscape, with different sights around each corner.
The Escalante Route is not to be underestimated and should only be undertaken by experienced backpackers. Whereas other overnight options in the Grand Canyon feature well-trodden trails and established campgrounds, the Escalante Route follows an unmaintained trail and camping is primitive (only one site has a pit toilet). The terrain is advanced, with exposed trails above steep canyon walls, tricky down climbing to access Seventyfive Mile Canyon, and the infamous Papago Wall and Slide (see below). Further, with each day holding between 1,200 and 4,650 feet of elevation gain or loss and little respite from the sun, the travel can be strenuous and taxing. .jpg)
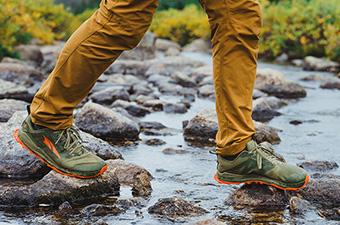
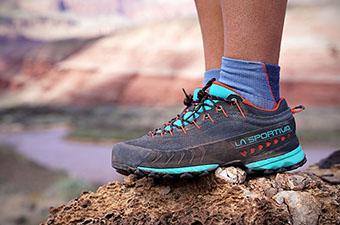
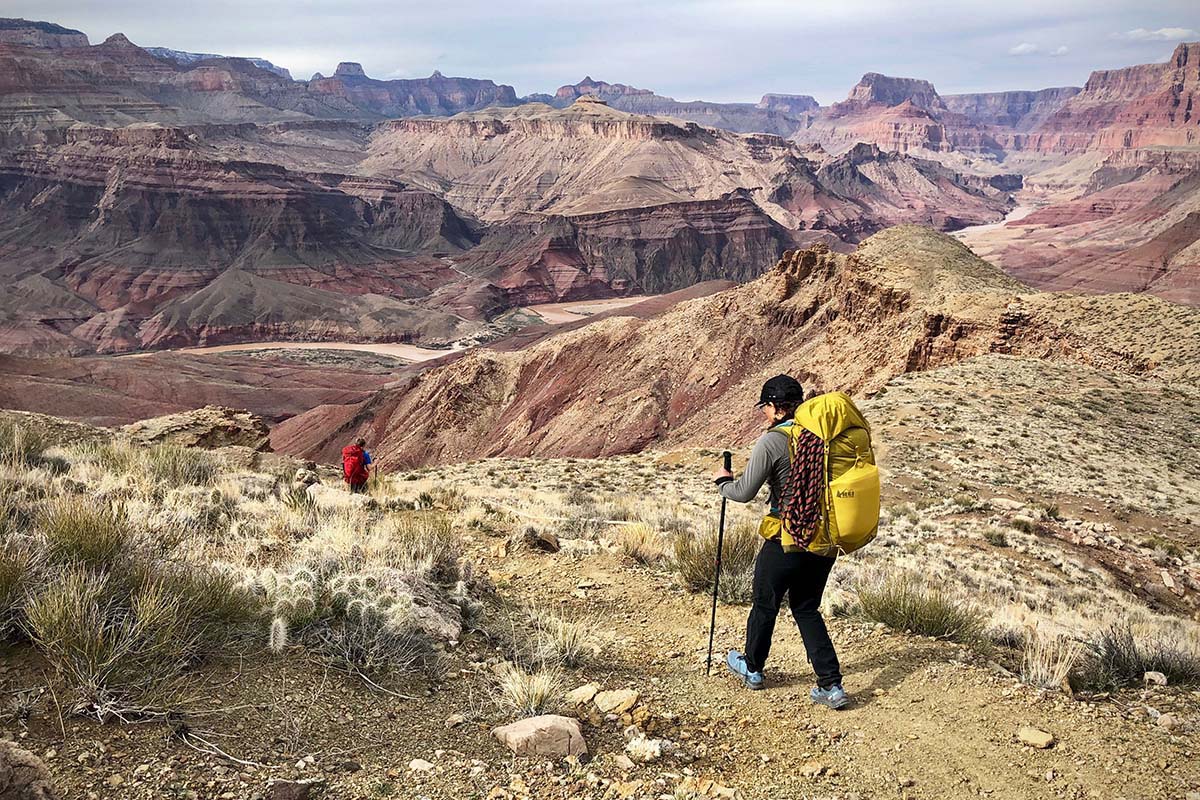
With so much rugged terrain and elevation gain and loss, the Escalante Route is an excellent opportunity for hikers to streamline their backpacking kit in order to be light and nimble on the trail. For starters, due to the dry nature of the route, we recommend a hiking shoe (instead of a hiking boot) for its excellent traction, comfort, and low weight. Members of our party wore a variety of models, including the Salomon Odyssey Triple Crown, Vasque Breeze LT Mid, and the La Sportiva TX4 approach shoe. If you need more ankle support or are anticipating deep snow during your trek, consider a mid-height hiking boot, although the added protection comes at the cost of weight and on-trail comfort. Further, most hikers will find lightweight and collapsible trekking poles to be invaluable for stepping down the loose and variable terrain..jpg)
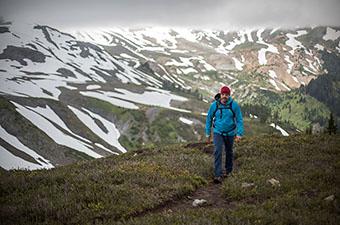
Weather in the Grand Canyon is all over the map, so bringing an assortment of layers is key to your comfort from sun-up to sun-down. Breathable and airy hiking pants and a wicking synthetic or wool t-shirt will be ideal for the trail, and you’ll want a long-sleeve baselayer and insulated jacket to wear once in camp. Due to the typically dry nature of the area, we have no qualms recommending down as your best bet for insulation, as it’s much more lightweight and compressible than synthetic. In the winter months, you’ll need to bring significantly more layers, including long underwear, a midlayer, and a heavyweight down jacket. And no matter what the forecast, we always recommend packing a rain jacket or hardshell. Finally, the sun in the Grand Canyon is not to be underestimated, and it’s important to be prepared with a sun hat, sunglasses, and sunscreen..jpg)
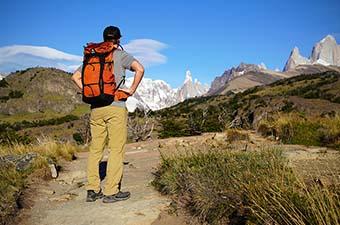
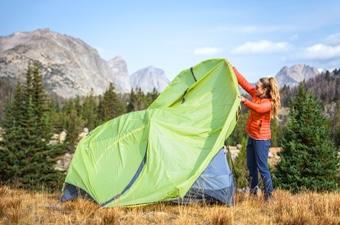
For camp, you’ll want to bring along a lightweight backpacking tent, sleeping pad, and sleeping bag. Depending on the time of year, your shelter can range from an ultralight tarp or pyramid (like the Black Diamond Mega Light) to a 3-season tent for protection against windy and wet conditions. Additionally, you’ll want to pack a backpacking stove (keep in mind your choice of stove depends on the type of meals you plan to prepare) and water filtration (see our section on water below). To carry all of this gear—plus water and food—we recommend a 40- to 65-liter backpacking pack. You can opt for the comfort and organization of a fully-featured pack like the Osprey Atmos AG 65, but we’ve also been impressed with ultralight packs such as the REI Co-op Flash 55 and Granite Gear Blaze 60.
The Escalante Route is technically an unmaintained trail, but an increasing amount of traffic during recent years has made it relatively easy to follow. That said, with no signs or markers along the way, the trail is sometimes difficult to locate (we would have missed the drop-in point to Seventyfive Mile Canyon had it not been for another group right in front of us). Because of this, we recommend being well-versed in navigation and bringing a map and compass or GPS-equipped device such as a smartphone. Should you decide to use your phone, a variety of impressively capable apps provide information on location, mileage, elevation, and landmarks, even in airplane mode. Maps.me, Gaia, Hiking Project, and Topo Maps+ are a few of our favorites..jpg)
As we mentioned above, the Escalante Route is a strenuous hike that covers rugged and unmaintained terrain. The most technical section of the trek is the Papago Wall and subsequent Slide, which most people will encounter on the third day of their trek (if traveling downstream). The wall is about 50 feet in height and requires short steps of fourth-class scrambling to surmount. Thankfully, there are a few generously sized ledges throughout the climb where you can stop, rest, and collect yourself before moving forward. Some hikers will find the Papago Wall to be easier without a backpack—stronger members of the party might consider shuttling loads up the cliff, or it can be helpful to bring a short rope (50 feet will suffice) for hauling packs. .jpg)
You’ll encounter the Slide (a loose rocky gully) just a few minutes down the trail from the Wall. Although perhaps easier to navigate, the objective danger of the slide is much more serious than that of the wall, and hikers should exercise extreme caution in this loose terrain. If you’re in a group, you have two options: either tackle the slide one person at a time (to avoid being hit by falling rock), or travel on each other’s heels (so that rock, if disturbed, does not have time to gain speed). While the wall and slide should pose little problem for most hikers fit enough to handle the rugged terrain and elevation gain and loss of the Escalante Route, we recommend traveling through these sections deliberately and with caution..jpg)
The Grand Canyon National Park refers to the area surrounding the Escalante Route as “primitive,” and allows “at-large camping” throughout (i.e., there are no designated campsites). Technically, this implies that you can camp anywhere along the route. That said, there are only a handful of spots where you’ll find both water and flat ground, and over time, hikers have established unmaintained campsites in these areas (these areas include Tanner Rapids, Cardenas Creek, Escalante Creek, Seventyfive Mile Creek, Hance Rapids, Hance Creek, and Horseshoe Mesa). In order to minimize your impact, we recommend camping in these areas and pitching your lightweight tent on sand or already established tent sites..jpg)
For hikers used to mountain environments, the weather of the Grand Canyon is a complete anomaly. With the rim at around 7,000 feet and the Colorado River about 5,000 feet below, you might start in snow and experience 80-degree temperatures on the canyon floor. The best time to hike the Grand Canyon is in the fall or spring, when temperatures are moderate both at the rim and inside the canyon. If you decide to hike the Escalante Route in the summer months (June through August), we recommend carrying extra water (especially for the dry descent from the rim to Tanner Beach) and hiking in the morning and evening rather than during the heat of the day. During the winter months or particularly cold shoulder-season days, micro-spikes can be helpful for navigating the shady and icy trails near the rim..jpg)
Water sources are intermittent along the Escalante Route, but thankfully each campsite has an endless supply, available from either clear water streams or the Colorado River. Because of the dry nature of the trail, we recommend leaving camp each morning with a plentiful water supply. All drinking water should be treated with a filter, purification drops or tablets, or a UV purifier (for more, see our article on the best backpacking water filters and purifiers). .jpg)
Further, keep in mind that water taken from the Colorado River will have a great deal of sediment, especially during the spring. This high-sediment water (reminiscent of chocolate milk) routinely clogged our Katadyn Gravity BeFree filter, reducing the flow to a painstakingly slow pace. We were able to restore the speed of filtration by swishing the filter in clean water, but doing this every 3 liters or so made water treatment a slow process for our group of six. If we visit the Grand Canyon again, we will be sure to pack a piece of equipment for pre-filtering, such as a drybag, dromedary, or a bucket like the Sea to Summit Folding Bucket. Once the sediment settles, the clean water can be poured carefully into a gravity filter or water bottle or be pumped straight from the bucket..jpg)
A backcountry permit is required to camp along the Escalante Route. This permit can be found online, but must be faxed, mailed, or submitted in person at the Backcountry Information Center on the South Rim. You cannot obtain a permit via email or phone. Backcountry permits are limited, so it’s best to apply early (up to four months in advance), and preference is often given to smaller groups. In terms of costs, a backcountry permit for the Grand Canyon is $10 plus $8 per night per person. For example, for three nights for a group of six, a permit will cost $154..jpg)
 The Grand Canyon Trust is a non-profit conservation organization that exists to protect the land and cultures in and around the Grand Canyon and the Colorado Plateau (including Bears Ears and Grand Staircase-Escalante National Monuments). Their projects include everything from political advocacy and education to facilitating tribal gatherings and restoration work. If you love the Southwest as much as we do, consider becoming a member of the Grand Canyon Trust, attending an event, or volunteering your time (in person or online).